Quantcast
Channel: Scott Hanselman's Blog
Viewing all 1148 articles
Browse latest View live

CSI: The case of the missing WAV audio files on the FAT32 SD Card

$
0
0

Scott Hanselman and Altered Carbon's Chris Conner who plays PoeBuckle up kids, as this is a tale. As you may know, I have a lovely podcast at https://hanselminutes.com. You should listen.

Recently through an number of super cool random events I got the opportunity to interview actor Chris Conner who plays Poe on Altered Carbon. I'm a big fan of the show but especially Chris. You should watch the show because Poe is a joy and Chris owns every scene, and that's with a VERY strong cast.

I usually do my interviews remotely for the podcast but I wanted to meet Chris and hang out in person so I used my local podcasting rig which consists of a Zoom H6 recorder.

I have two Shure XLR mics, a Mic stand, and the Zoom. The Zoom H6 is a very well though of workhorse and I've used it many times before when recording shows. It's not rocket surgery but one should always test their things.

I didn't want to take any chances to I picked up a 5 pack of 32GIG high quality SD Cards. I put a new one in the Zoom, the Zoom immediately recognized the SD Card so I did a local recording right there and played it back. Sounds good. I played it back locally on the Zoom and I could hear the recording from the Zoom's local speaker. It's recording the file in stereo, one side for each mic. Remember this for later.

I went early to the meet and set up the whole recording setup. I hooked up a local monitor and tested again. Records and plays back locally. Cool. Chris shows up, we recorded a fantastic show, he's engaged and we're now besties and we go to Chipotle, talk shop, Sci-fi, acting, AIs, etc. Just a killer afternoon all around.

I head home and pull out the SD Card and put it into the PC and I see this. I almost vomit. I get lightheaded.

Infinite folders recursing. They are empty.

I've been recording the show for over 730 episodes over 14 years and I've never lost a show. I do my homework - as should you. I'm reeling. Ok, breathe. Let's work the problem.

Right click the drive, check properties. Breathe. This is a 32 gig drive, but Windows sees that it's got 329 MB used. 300ish megs is the size of a 30 minute long two channel WAV file. I know this because I've looked at 300 meg files for the last several hundred shows. Just like you might know roughly the size of a JPEG your camera makes. It's a thing you know.

A 32gig (really 29.1GB) drive with 329 MB used

Command line time. List the root directory. Empty. Check it again but "show all files," weird, there's a Mac folder there but maybe the SD Card was preformatted on a Mac.

Interesting Plot Point - I didn't format the SD card. I use it as it came out of the packaging from Amazon. It came preformatted and I accepted it. I tested it and it worked but I didn't "install my own carpet." I moved in to the house as-is.

What about a little "show me all folders from here down" action? Same as I saw in Windows Explorer. The root folder has another subfolder which is itself. It's folder "Inception" with no Kick!

G:\>dir /a

Volume in drive G has no label.
Volume Serial Number is 0403-0201
Directory of G:\
03/12/2020 12:29 PM <DIR>
03/13/2020 12:44 PM <DIR> System Volume Information
0 File(s) 0 bytes
2 Dir(s) 30,954,225,664 bytes free
G:\>dir /s
Volume in drive G has no label.
Volume Serial Number is 0403-0201
Directory of G:\
03/12/2020 12:29 PM <DIR>
0 File(s) 0 bytes
Directory of G:\
03/12/2020 12:29 PM <DIR>
0 File(s) 0 bytes
IT GOES FOREVER

Ok, the drive thinks there's data but I can't see it. I put the SD card back in the Zoom and try to play it back.

The Zoom can see folders and files AND the interview itself. And the Zoom can play it back. The Zoom is an embedded device with an implementation of the FAT32 file system and it can read it, but Windows can't. Can Linux? Can a Mac?

Short answer. No.

Hacky Note: Since the Zoom can see and play the file and it has a headphone/monitor jack, I could always plug in an analog 1/8" headphone cable to a 1/4" input on my Peavy PV6 Mixer and rescue the audio with some analog quality loss. Why don't I use the USB Audio out feature of the Zoom H6 and play the file back over a digital cable, you ask? Because the Zoom audio player doesn't support that. It supports three modes - SD Card Reader (which is a pass through to Windows and shows me the recursive directories and no files), an Audio pass-through which lets the Zoom look like an audio device to Windows but doesn't show the SD card as a drive or allow the SD Card to be played back over the digital interface, or its main mode where it's recording locally.

It's Forensics Time, Kids.

We have an 32 SD Card - a disk drive as it were - that is standard FAT32 formatted, that has 300-400 megs of a two-channel (Chris and I had two mics) WAV file that was recorded locally by the Zoom H6  audio reorder and I don't want too lose it or mess it up.

I need to take a byte for byte image of what's on the SD Card so I can poke and it and "virtually" mess with with it, change it, fix it, try again, without changing the physical.

"dd" is a command-line utility with a rich and storied history going back 45 years. Even though it means "Data Definition" it'll always be "disk drive" I my head.

How to clone a USB Drive or SD Card to an IMG file on Windows

I have a copy of dd for Windows which lets me get a byte for byte stream/file that represents this SD Card. For example I could get an entire USD device:

dd if=\\?\Device\Harddisk1\Partition0 of=c:\temp\usb2.img bs=1M --size --progress

I need to know the Harddisk number and Partition number as you can see above. I usually use diskpart for this.

>diskpart


Microsoft DiskPart version 10.0.19041.1

Copyright (C) Microsoft Corporation.
On computer: IRONHEART

DISKPART> list disk

Disk ### Status Size Free Dyn Gpt
-------- ------------- ------- ------- --- ---
Disk 0 Online 476 GB 0 B *
Disk 1 Online 1863 GB 0 B *
Disk 2 Online 3725 GB 0 B
Disk 3 Online 2794 GB 0 B *
Disk 8 Online 29 GB 3072 KB

DISKPART> select disk 8

Disk 8 is now the selected disk.

DISKPART> list part

Partition ### Type Size Offset
------------- ---------------- ------- -------
Partition 1 Primary 29 GB 4096 KB

Looks like it's Disk 8 Partition 1 on my system. Let's get it all before I panic.

dd if=\\?\Device\Harddisk8\Partition1 of=c:\temp\ZOMG.img bs=1M --size --progress

IF and OF are input file and output file, and I will do it for the whole size of the SD Card. It's likely overkill though as we'll see in a second.

This file ended up being totally massive and hard to work with. Remember I needed just the first 400ish megs? I'll chop of just that part.

dd if=ZOMG.img of=SmallerZOMG.img bs=1M count=400

What is this though? Remember it's an image of a File System. It just bytes in a file. It's not a WAV file or a THIS file or a THAT file. I mean, it is if we decide it is, but in fact, a way to think about it is that it's a mangled envelope that is dark when I peer inside it. We're gonna have to feel around and see if we can rebuild a sense of what the contents really are.

Importing Raw Bytes from an IMG into Audition or Audacity

Both Adobe Audition and Audacity are audio apps that have an "Import RAW Data" feature. However, I DO need to tell Audition how to interpret it. There's lots of WAV files out there. How many simples were there? 1 channel? 2 channel? 16 bit or 32 bit? Lots of questions.

image

Can I just import this 4 gig byte array of a file system and get something?

Looks like something. You can see that the first part there is likely the start of the partition table, file system headers, etc. before audio data shows up. Here's importing as 2 channel.

image

I can hear voices but they sound like chipmunks and aren't understandable. Something is "doubled." Sample rate? No, I double checked it.

Here's 1 channel raw data import even though I think it's two.

Raw audio data 1 channel

Now THIS is interesting. I can hear audio at normal speed of us talking (after the preamble) BUT it's only a syllable at a time, and then a quieter version of the same syllable repeats. I don't want to (read: can't really) reassemble a 30 min interview from syllables, right?

Remember when I said that the Zoom H6 records a two channel file with one channel per mic? Not really. It records ONE FILE PER CHANNEL. A whateverL.wav and a whateverR.wav. I totally forgot!

This "one channel" file above is actually the bytes as they were laid down on disk, right? It's actually two files written simultaneously, a few kilobytes at a time, L,R,L,R,L,R. And here I am telling my sound software to treat this "byte for byte file system dump" as one file. It's two that were made at the same time.

It's like the Brundlefly. How do I tease it apart? Well I can't treat the array as a raw file anymore, it's not. And I want (really don't have the energy yet) to write my own little app to effectively de-interlace this image. I also don't know if the segment size is perfectly reliable or if it varies as the Zoom recorded.

NOTE: Pete Brown has written about RIFF/WAV files from Sound Devices records having an incorrect FAT32 bit set. This isn't that, but it's in the same family and is worth noting if you ever have an issue with a Broadcast Wave File getting corrupted or looking encrypted.

Whole helping me work this issue, Pete Brown tweeted a hexdump of the Directory Table so you can see the Zoom0001, Zoom0002, etc directories there in the image.

Hexdump of FAT32 Directory Table shows that there ARE directories

Let me move into Ubuntu on my Windows machine running WSL. Here I can run fdisk and get some sense of what this Image of the bad SD Card is. Remember also that I hacked off the first 0-400 Megs but this IMG file thinks it's a 32gig drive, because it is. It's just that's been aggressively truncated.

$ fdisk -u -l SmallerZOMG.img

Disk SmallerZOMG.img: 400 MiB, 419430400 bytes, 819200 sectors
Units: sectors of 1 * 512 = 512 bytes
Sector size (logical/physical): 512 bytes / 512 bytes
I/O size (minimum/optimal): 512 bytes / 512 bytes
Disklabel type: dos
Disk identifier: 0x00000000

Device Boot Start End Sectors Size Id Type
SmallerZOMG.img1 8192 61157375 61149184 29.2G c W95 FAT32 (LBA)

Maybe I can "mount" this IMG? I make a folder on Ubuntu/WSL2 called ~/recovery. Yikes, ok there's nothing there. I can take the sector size 512 times the Start block of 8192 and use that as the offset.

sudo mount -o loop,offset=4194304 SmallerShit.img recover/

$ cd recover/
$ ll
total 68
drwxr-xr-x 4 root root 32768 Dec 31 1969 ./

Ali Mosajjal thinks perhaps "they re-wrote the FAT32 structure definition and didn't use a standard library and made a mistake," and Leandro Pereria postulates "what could happen is that the LFN (long file name) checksum is invalid and they didn't bother filling in the 8.3 filename... so that complying implementations of VFAT tries to look at the fallback 8.3 name, it's all spaces and figures out "it's all padding, move along."

Ali suggested running dosfsck on the mounted image and you can see again that the files are there, but there's like 3 root entries? Note I've done a cat of /proc/mounts to see the loop that my img is mounted on so I can refer to it in the dosfsck command.

$ sudo dosfsck -w -r -l -a -v -t /dev/loop3

fsck.fat 4.1 (2017-01-24)
Checking we can access the last sector of the filesystem
Boot sector contents:
System ID " "
Media byte 0xf8 (hard disk)
512 bytes per logical sector
32768 bytes per cluster
1458 reserved sectors
First FAT starts at byte 746496 (sector 1458)
2 FATs, 32 bit entries
3821056 bytes per FAT (= 7463 sectors)
Root directory start at cluster 2 (arbitrary size)
Data area starts at byte 8388608 (sector 16384)
955200 data clusters (31299993600 bytes)
63 sectors/track, 255 heads
8192 hidden sectors
61149184 sectors total
Checking file /
Checking file /
Checking file /
Checking file /System Volume Information (SYSTEM~1)
Checking file /.
Checking file /..
Checking file /ZOOM0001
Checking file /ZOOM0002
Checking file /ZOOM0003
Checking file /ZOOM0001/.
Checking file /ZOOM0001/..
Checking file /ZOOM0001/ZOOM0001.hprj (ZOOM00~1.HPR)
Checking file /ZOOM0001/ZOOM0001_LR.WAV (ZOOM00~1.WAV)
Checking file /ZOOM0002/.
Checking file /ZOOM0002/..
Checking file /ZOOM0002/ZOOM0002.hprj (ZOOM00~1.HPR)
Checking file /ZOOM0002/ZOOM0002_Tr1.WAV (ZOOM00~1.WAV)
Checking file /ZOOM0002/ZOOM0002_Tr2.WAV (ZOOM00~2.WAV)
Checking file /ZOOM0003/.
Checking file /ZOOM0003/..
Checking file /ZOOM0003/ZOOM0003.hprj (ZOOM00~1.HPR)
Checking file /ZOOM0003/ZOOM0003_Tr1.WAV (ZOOM00~1.WAV)
Checking file /ZOOM0003/ZOOM0003_Tr2.WAV (ZOOM00~2.WAV)
Checking file /System Volume Information/.
Checking file /System Volume Information/..
Checking file /System Volume Information/WPSettings.dat (WPSETT~1.DAT)
Checking file /System Volume Information/ClientRecoveryPasswordRotation (CLIENT~1)
Checking file /System Volume Information/IndexerVolumeGuid (INDEXE~1)
Checking file /System Volume Information/AadRecoveryPasswordDelete (AADREC~1)
Checking file /System Volume Information/ClientRecoveryPasswordRotation/.
Checking file /System Volume Information/ClientRecoveryPasswordRotation/..
Checking file /System Volume Information/AadRecoveryPasswordDelete/.
Checking file /System Volume Information/AadRecoveryPasswordDelete/..
Checking for bad clusters.

We can see  them, but can't get at them with the vfat file system driver on Linux or with Windows.

The DUMP.exe util as part of mtools for Windows is amazing but I'm unable to figure out what is wrong in the FAT32 file table. I can run minfo on the Linux command land telling it to skip 8192 sectors in with the @@offset modifier:

$ minfo -i ZOMG.img@@8192S

device information:
===================
filename="ZOMG.img"
sectors per track: 63
heads: 255
cylinders: 3807

mformat command line: mformat -T 61149184 -i ZOMG.img@@8192S -h 255 -s 63 -H 8192 ::

bootsector information
======================
banner:" "
sector size: 512 bytes
cluster size: 64 sectors
reserved (boot) sectors: 1458
fats: 2
max available root directory slots: 0
small size: 0 sectors
media descriptor byte: 0xf8
sectors per fat: 0
sectors per track: 63
heads: 255
hidden sectors: 8192
big size: 61149184 sectors
physical drive id: 0x80
reserved=0x0
dos4=0x29
serial number: 04030201
disk label=" "
disk type="FAT32 "
Big fatlen=7463
Extended flags=0x0000
FS version=0x0000
rootCluster=2
infoSector location=1
backup boot sector=6

Infosector:
signature=0x41615252
free clusters=944648
last allocated cluster=10551

Ok, now we've found yet ANOTHER way to mount this corrupted file system. With mtools we'll use mdir to list the root directory. Note there is something wrong enough that I have to set mtools_skip_check=1 to ~/.mtoolsrc and continue.

$ mdir -i ZOMG.img@@8192S ::

Total number of sectors (61149184) not a multiple of sectors per track (63)!
Add mtools_skip_check=1 to your .mtoolsrc file to skip this test
$ pico ~/.mtoolsrc
$ mdir -i ZOMG.img@@8192S ::
Volume in drive : is
Volume Serial Number is 0403-0201
Directory for ::/

<DIR> 2020-03-12 12:29
1 file 0 bytes
30 954 225 664 bytes free

Same result. I can run mdu and see just a few folders. Note the ZOOMxxxx ones are missing here

$ mdu -i ZOMG.img@@8192S ::

::/System Volume Information/ClientRecoveryPasswordRotation 1
::/System Volume Information/AadRecoveryPasswordDelete 1
::/System Volume Information 5
::/ 6

Now, ideally I want to achieve two things here.

  • Know WHY it's broken and exactly WHAT is wrong.
    • There's a nameless root directory here and I lack the patience and skill to manually hexdump and patch it.
  • Be able to copy the files out "normally" by mounting the IMG and, well, copying them out.

UPDATE #1 - I'm back after a few minutes of thinking again.

If I use mmls from Sleuthkit, I can see this.

$ mmls HolyShit.img

DOS Partition Table
Offset Sector: 0
Units are in 512-byte sectors

Slot Start End Length Description
000: Meta 0000000000 0000000000 0000000001 Primary Table (#0)
001: ------- 0000000000 0000008191 0000008192 Unallocated
002: 000:000 0000008192 0061157375 0061149184 Win95 FAT32 (0x0c)

If I do the 512*8192 offset again and visualize the FAT32 table in Hexdump/xxd like this:

xxd -seek 4194304 ZOMG.img  | more

00400000: eb00 9020 2020 2020 2020 2000 0240 b205 ... ..@..
00400010: 0200 0000 00f8 0000 3f00 ff00 0020 0000 ........?.... ..
00400020: 0010 a503 271d 0000 0000 0000 0200 0000 ....'...........
00400030: 0100 0600 0000 0000 0000 0000 0000 0000 ................
00400040: 8000 2901 0203 0420 2020 2020 2020 2020 ..)....
00400050: 2020 4641 5433 3220 2020 0000 0000 0000 FAT32 ......
00400060: 0000 0000 0000 0000 0000 0000 0000 0000 ................
00400070: 0000 0000 0000 0000 0000 0000 0000 0000 ................
00400080: 0000 0000 0000 0000 0000 0000 0000 0000 ................
00400090: 0000 0000 0000 0000 0000 0000 0000 0000 ................
004000a0: 0000 0000 0000 0000 0000 0000 0000 0000 ................
004000b0: 0000 0000 0000 0000 0000 0000 0000 0000 ................
004000c0: 0000 0000 0000 0000 0000 0000 0000 0000 ................

I can see I seek'ed to the right spot, as the string FAT32 is just hanging out. Maybe I can clip out this table and visualize it in a better graphical tool.

I could grab a reasonable (read: arbitrary) chunk from this offset and put it in a very small manageable file:

dd if=ZOMG.img ibs=1 skip=4194304 count=64000 > another.img

And then load it in dump.exe on Windows which is really a heck of a tool. It seems to be thinking thinking there's multiple FAT Root Entries (which might be why I'm seeing this weird ghost root). Note the "should be" parts as well.

FAT Root Entry (non LFN) (0x00000000)

Name: ···
Extension:
Attribute: 0x00
FAT12:reserved: 02 40 B2 05 02 00 00 00 00 F8
FAT32:reserved: 02
FAT32:creation 10th: 0x40
FAT32:creation time: 0x05B2
FAT32:creation date: 0x0002
FAT32:last accessed: 0x0000
FAT32:hi word start cluster: 0xF800
Time: 0x0000 (00:00:00) (hms)
Date: 0x003F (1980/01/31) (ymd)
Starting Cluster: 0x00FF (0xF80000FF)
File Size: 8192

FAT Root Entry (non LFN) (0x00000020)
Name: ····'···
Extension: ···
Attribute: 0x00
FAT12:reserved: 02 00 00 00 01 00 06 00 00 00
FAT32:reserved: 02
FAT32:creation 10th: 0x00
FAT32:creation time: 0x0000
FAT32:creation date: 0x0001
FAT32:last accessed: 0x0006
FAT32:hi word start cluster: 0x0000
Time: 0x0000 (00:00:00) (hms)
Date: 0x0000 (1980/00/00) (ymd)
Starting Cluster: 0x0000 (0x00000000) <--- should be 0x0002 or higher.
File Size: 0

FAT Root Entry (non LFN) (0x00000040)
Name: ··)····
Extension:
Attribute: 0x20 Archive
FAT12:reserved: 20 20 20 20 20 20 46 41 54 33
FAT32:reserved: 20
FAT32:creation 10th: 0x20
FAT32:creation time: 0x2020
FAT32:creation date: 0x2020
FAT32:last accessed: 0x4146
FAT32:hi word start cluster: 0x3354
Time: 0x2032 (04:01:18) (hms)
Date: 0x2020 (1996/01/00) (ymd)
Starting Cluster: 0x0000 (0x33540000)
File Size: 0

FAT Root Entry (non LFN) (0x00000060)
Name: ········
Extension: ···
Attribute: 0x00
FAT12:reserved: 00 00 00 00 00 00 00 00 00 00
FAT32:reserved: 00
FAT32:creation 10th: 0x00
FAT32:creation time: 0x0000
FAT32:creation date: 0x0000
FAT32:last accessed: 0x0000
FAT32:hi word start cluster: 0x0000
Time: 0x0000 (00:00:00) (hms)
Date: 0x0000 (1980/00/00) (ymd)
Starting Cluster: 0x0000 (0x00000000) <--- should be 0x0002 or higher.
File Size: 0

FAT Root Entry (non LFN) (0x00000080)
Name: ········
Extension: ···
Attribute: 0x00
FAT12:reserved: 00 00 00 00 00 00 00 00 00 00
FAT32:reserved: 00
FAT32:creation 10th: 0x00
FAT32:creation time: 0x0000
FAT32:creation date: 0x0000
FAT32:last accessed: 0x0000
FAT32:hi word start cluster: 0x0000
Time: 0x0000 (00:00:00) (hms)
Date: 0x0000 (1980/00/00) (ymd)
Starting Cluster: 0x0000 (0x00000000) <--- should be 0x0002 or higher.
File Size: 0

FAT32 Info Block (0x00000000)
sig: 0x209000EB (' ···') [1] <--- should be 0x41615252.
reserved:
00000004 20 20 20 20 20 20 20 00-02 40 B2 05 02 00 00 00 .........@......
00000014 00 F8 00 00 3F 00 FF 00-00 20 00 00 00 10 A5 03 ....?...........
00000024 27 1D 00 00 00 00 00 00-02 00 00 00 01 00 06 00 '...............
00000034 00 00 00 00 00 00 00 00-00 00 00 00 80 00 29 01 ..............).
00000044 02 03 04 20 20 20 20 20-20 20 20 20 20 20 46 41 ..............FA
00000054 54 33 32 20 20 20 00 00-00 00 00 00 00 00 00 00 T32.............

The most confusing part is that the FAT32 signature - the magic number is always supposed to be 0x41615252. Google that. You'll see. It's a hardcoded signature but maybe I've got the wrong offset and at that point all bets are off.

So do I have that? I can search a binary file for Hex values with a combo of xxd and grep. Note the byte swap:

xxd another.img  | grep "6141"

00000200: 5252 6141 0000 0000 0000 0000 0000 0000 RRaA............
00000e00: 5252 6141 0000 0000 0000 0000 0000 0000 RRaA............

Just before this is 55 AA which is the last two bytes of the 64 byte partition table. mm

Now do I have two FAT32 info blocks and three Root Entries? I'm lost. I want to dump the directory entries.

What does fsstat say about the Root Directory?

File System Layout (in sectors)

Total Range: 0 - 61149183
* Reserved: 0 - 1457
** Boot Sector: 0
** FS Info Sector: 1
** Backup Boot Sector: 6
* FAT 0: 1458 - 8920
* FAT 1: 8921 - 16383
* Data Area: 16384 - 61149183
** Cluster Area: 16384 - 61149183
*** Root Directory: 16384 - 16447

I'll update this part as I learn more. I'm exhausted. Someone will likely read this and be like "you dork, seek HERE" and there's the byte that's wrong in the file system. That LFN (long file name) has no short one, etc" and then I'll know.

UPDATE #2:

I skyped with Ali and we think we know what's up. He suggested I format the SD Card, record the same 3 shows (two test WAVs and one actual one) and then make an image of the GOOD disk to remove variables. Smart guy!

We then took the first 12 megs or so of the GOOD.img and the BAD.img and piped them through xxd into HEX, then used Visual Studio Code to diff them.

We can now visualize on the left what a good directory structure looks like and the right what a bad one looks like. Seems like I do have two recursive root directories with a space for the name.

Bad directory structures

Now if we wanted we could manually rewrite a complete new directory entry and assign our orphaned files to it.

That's what I would do if I was hired to recover data.

7zip all the things

Here's where it gets weird and it got so weird that both Pete Brown and I were like, WELL. THAT'S AMAZING.

On a whim I right-clicked the IMG file and opened it in 7zip and saw this.

Opening an img in 7zip

See that directory there that's a nothing? A space? A something. It has no Short Name. It's an invalid entry but 7zip is cool with it. Let's go in. Watch the path and the \\. That's a path separator, nothing, and another path separator. That's not allowed or OK but again, 7zip is chill.

The recovered files

I dragged the files out and they're fine! The day is saved.

The moral? There are a few I can see.

  • Re-format the random SD cards you get from Amazon specifically on the device you're gonna use them.
  • FAT as a spec has a bunch of stuff that different "drivers" (Windows, VFAT, etc) may ignore or elide over or just not implement.
  • I've got 85% of the knowledge I need to spelunk something like this but that last 15% is a brick wall. I would need more patience and to read more about this.
  • Knowing how to do this is useful for any engineer. It's the equivalent of knowing how to drive a stick shift in an emergency even if you usually use Lyft.
    • I'm clearly not an expert but I do have a mental model that includes (but not limited to) bytes on the physical media, the file system itself, file tables, directory tables, partition tables, how they kinda work on Linux and Windows.
    • I clearly hit a wall as I know what I want to do but I'm not sure the next step.
      • There's a bad Directory Table Entry. I want to rename it and make sure it's complete and to spec.
  • 7zip is amazing. Try it first for basically everything.

Ideally I'd be able to update this post with exactly what byte is wrong and how to fix it. Thanks to Ali, Pete, and Leandro for playing with me!

Your thoughts? (If you made it this far the truncated IMG of the 32 gig SD is here (500 megs) but you might have to pad it out with zeros to make some tools like it.

Oh, and listen to https://hanselminutes.com/ as the interview was great and it's coming soon!


Sponsor: Have you tried developing in Rider yet? This fast and feature-rich cross-platform IDE improves your code for .NET, ASP.NET, .NET Core, Xamarin, and Unity applications on Windows, Mac, and Linux.


© 2019 Scott Hanselman. All rights reserved.
     

Take Remote Worker/Educator webcam video calls to the next level with OBS, NDI Tools, and Elgato Stream Deck

$
0
0

Changing cameras dyamically with OBSOver the years I've collected a few webcams, some quality and some not. If you're interested in creating the ultimate remote worker webcam setup on a budget, I've written a blog post on the topic.

However, now that we are a remote workers - my entire company has everyone working remotely until further notice - I've found that an extra webcam or two can really be helpful if I want to point a camera at something on my desk, or get a wider view, look at a whiteboard, etc.

Of course, you can always change video inputs in any application but there's that...pause...that...hang...that moment. You have to switch into your apps Device Settings, do the dropdown, switch, wait, and then you've changed the camera.

What if you could change cameras - scenes - like you were a movie director. But, you have minimal budget. What can you do for nothing or next to nothing? A lot.

What's the goal?

With minimal setup, you can feed all your webcams, your desktop itself, and really anything you can express as a 'scene' into a software video compositor and then output them as a virtual webcam.

Then you select and use that Virtual Webcam in your remote video conferencing tool of choice! The results are amazing.

Setup

First, get OBS and NDI Tools, specifically NDI Virtual Input.

Install these three things and run OBS. When you run OBS after installing the NDI plugin, you'll need to go to Tools, NDI Output Settings and select Main Output. Leave OBS running.

NDI Output Settings in OBS

Then run Virtual Input and right click on it in your tray (near the clock) and set it's output to your computer name | OBS. Mine is IRONHEART in the picture below. If you see None, you likely don't have OBS running.

Taking output from OBS and feeding it into Virtual Input

Define your Scenes. Scenes are a collection of sources.

Add and name a scene, then add a Video Capture Device for your camera. I also like to set the Resolution manually.

BRIO 1080p in OBS

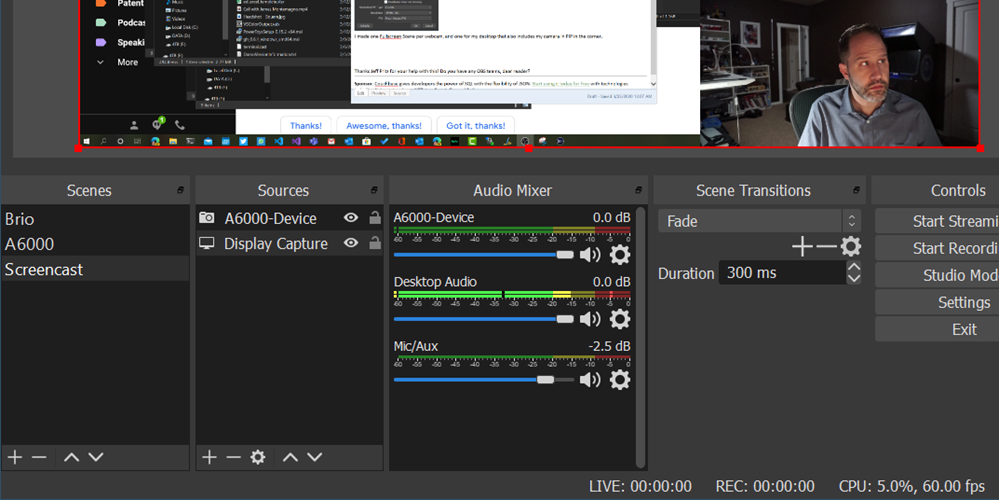
I made one Fullscreen Scene per webcam, and one for my desktop that also includes my camera in PIP in the corner.

NOTE: If you're a teacher, perhaps you share just your lesson plans or browser window and yourself in video another way. You can be split screen, pip, or whatever makes you happy! Your scenes can be as complex as you'd like and include lesson plans, links, resources, and more!

PIP inside OBS

To review:

  • OBS is a compositor that feeds into
  • NDI Virtual Input
  • And Scenes can be changed dynamically (see animation at top of this post) by a Stream Deck, hotkey, or Stream Deck Mobile
  • Select "NewTek NDI Video" as your webcam in Teams or Skype or Zoom!

At this point you can change camera angles and select scenes when you're on a call! The transitions will be be instant and smooth for your viewers. This also works great for workshops and teachers teaching classes!

image

Thanks Jeff Fritz for your help with this! Do you have any OBS teams, dear reader?


Sponsor: Couchbase gives developers the power of SQL with the flexibility of JSON. Start using it today for free with technologies including Kubernetes, Java, .NET, JavaScript, Go, and Python.


© 2020 Scott Hanselman. All rights reserved.
     

Windows Terminal 1.0 is coming - Update now and set up your split pane hotkeys!

$
0
0

The Windows Terminal is free and in the Windows Store and you should go make sure you have the latest update. The v0.10 is out and it's got a number of lovely quality of life improvements, not the least of which is Mouse Support!

Mouse Support

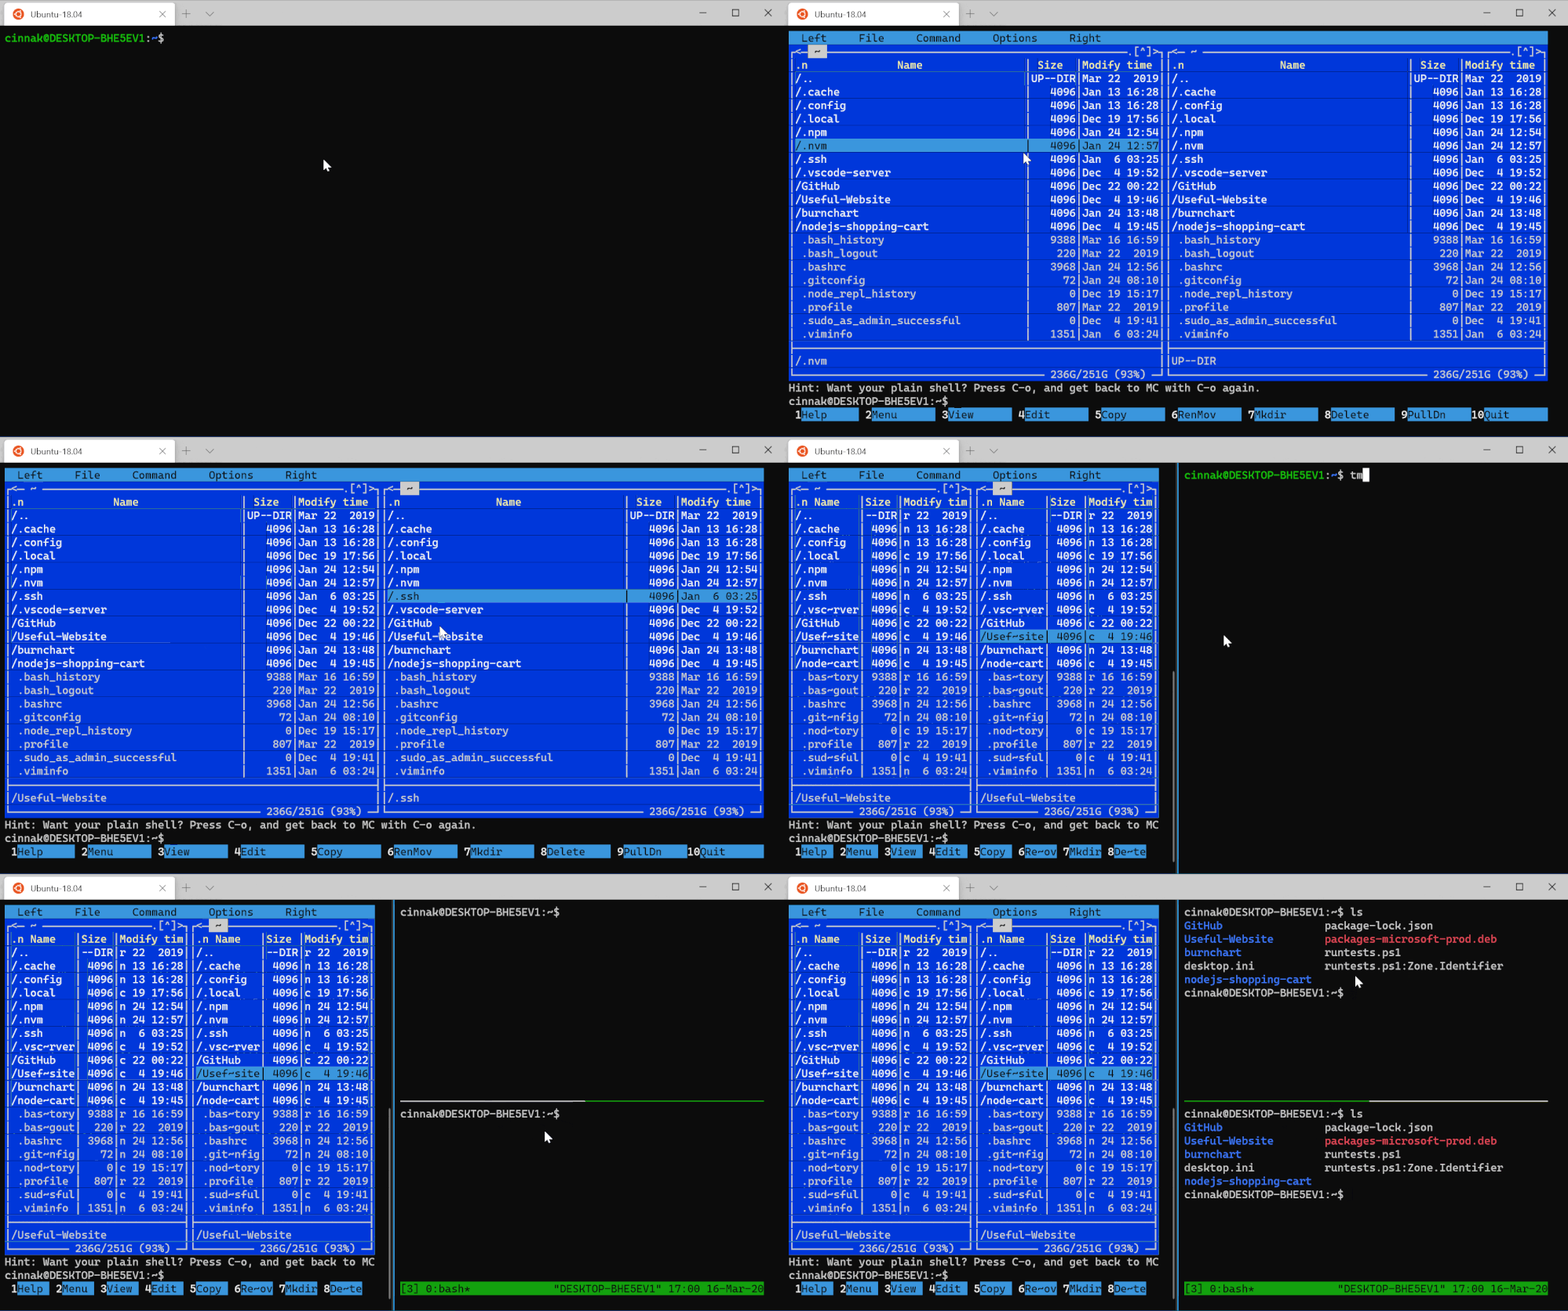
What's that mean, doesn't it already support mice? This means Text-Mode mouse support. So your apps like tmux and Midnight Commander can receive and react to mouse events, event when you're ssh'ed in remotely! That's because it's using VT (virtual terminal) textual commands under the covers.

Mouse Support for text mode is super useful if you use apps like Midnight Commander under Linux, or if you split plans with tmux.

Split Pane

You can change Windows Terminal in any way with themes, colors, gifs, key bindings and more. Many of you use screen or tmux under Linux and you can and should do that.

Terminal also supports splitting natively and for any shell (remember terminal != console != shell) and they just added a lovely splitMode=duplicate that makes a copy of the shell/profile in focus.

NOTE: You might consider starting with a fresh profile if yours is getting out of control.

{

"keys": ["ctrl+shift+d"],
"command": {
"action": "splitPane",
"split": "auto",
"splitMode": "duplicate"
}
}

Here's my whole keybindings section right now, including the part above.

"keybindings": [

{
"command": "closeTab",
"keys": ["ctrl+w"]
},
{
"command": "newTab",
"keys": ["ctrl+t"]
},
{
"command": {
"action": "splitPane",
"split": "auto"
},
"keys": ["ctrl+|"]
},
{
"keys": ["ctrl+shift+d"],
"command": {
"action": "splitPane",
"split": "auto",
"splitMode": "duplicate"
}
}
],

So I can split with ctrl+shift+d and get a copy of whatever is in front. I can use ctrl+| to get my default terminal, and I can use ctrl+shift+w to close the pane in focus, while ctrl+w close the current tab. Yummy.

Currently, the Terminal teams says they are fixing bugs to prepare for the release of v1. Windows Terminal v1 will be released in May!


Sponsor: Couchbase gives developers the power of SQL with the flexibility of JSON. Start using it today for free with technologies including Kubernetes, Java, .NET, JavaScript, Go, and Python.


© 2020 Scott Hanselman. All rights reserved.
     

Easily adding Security Headers to your ASP.NET Core web app and getting an A grade

$
0
0

Well that sucks.

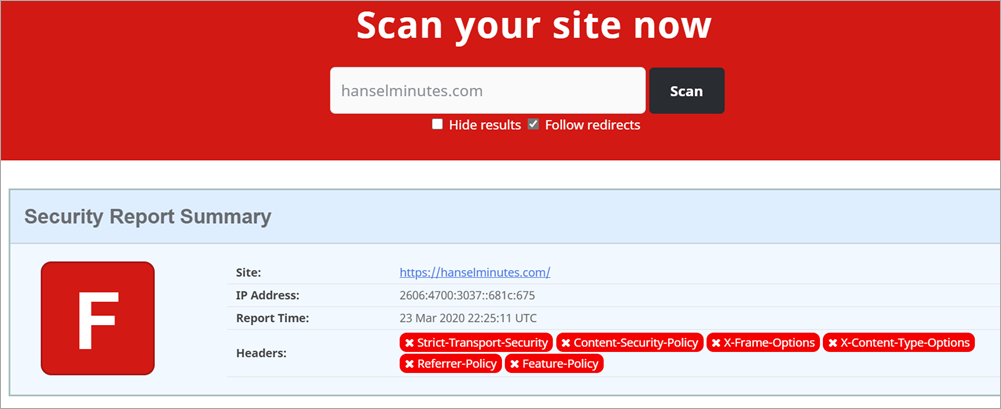
Score of F on SecurityHeaders.com

That's my podcast website with an F rating from SecurityHeaders.com. What's the deal? I took care of this months ago!

Turns out, recently I moved from Windows to Linux on Azure.

If I am using IIS on Windows, I can (and did) make a section in my web.config that looks something like this.

Do note that I've added a few custom things and you'll want to make sure you DON'T just copy paste this. Make yours, yours.

Note that I've whitelisted a bunch of domains to make sure my site works. Also note that I have a number of "unsafe-inlines" that are not idea.

<configuration>

<system.webServer>
<httpProtocol>
<customHeaders>
<add name="Strict-Transport-Security" value="max-age=31536000"/>
<add name="X-Content-Type-Options" value="nosniff"/>
<add name="X-Xss-Protection" value="1; mode=block"/>
<add name="X-Frame-Options" value="SAMEORIGIN"/>
<add name="Content-Security-Policy" value="default-src https:; img-src * 'self' data: https:; style-src 'self' 'unsafe-inline' www.google.com platform.twitter.com cdn.syndication.twimg.com fonts.googleapis.com; script-src 'self' 'unsafe-inline' 'unsafe-eval' www.google.com cse.google.com cdn.syndication.twimg.com platform.twitter.com platform.instagram.com www.instagram.com cdn1.developermedia.com cdn2.developermedia.com apis.google.com www.googletagservices.com adservice.google.com securepubads.g.doubleclick.net ajax.aspnetcdn.com ssl.google-analytics.com az416426.vo.msecnd.net/;"/>
<add name="Referrer-Policy" value="no-referrer-when-downgrade"/>
<add name="Feature-Policy" value="geolocation 'none';midi 'none';notifications 'none';push 'none';sync-xhr 'none';microphone 'none';camera 'none';magnetometer 'none';gyroscope 'none';speaker 'self';vibrate 'none';fullscreen 'self';payment 'none';"/>
<remove name="X-Powered-By" />
<remove name="X-AspNet-Version" />
<remove name="Server" />
</customHeaders>
</httpProtocol>
...

But, if I'm NOT using IIS - meaning I'm running my ASP.NET app in a container or on Linux - this will be ignored. Since I recently moved to Linux, I assumed (my bad for no tests here) that it would just work.

My site is hosted on Azure App Service for Linux, so I want these headers to be output the same way. There are several great choices in the form of Open Source NuGet libraries to help. If I use the ASP.NET Core middleware pipeline then these headers will be output and work the SAME on both Windows AND Linux.

I'll be using the NWebsec Security Libraries for ASP.NET Core. They offer a simple fluent way to add the headers I want.

TO BE CLEAR: Yes I, or you, can add these headers manually with AddHeader but these simple libraries ensure that our commas and semicolons are correct. They also offer a strongly typed middleware that is fast and easy to use.

Taking the same web.config above and translating it to Startup.cs's Configure Pipeline with NWebSec looks like this:

app.UseHsts(options => options.MaxAge(days: 30));

app.UseXContentTypeOptions();
app.UseXXssProtection(options => options.EnabledWithBlockMode());
app.UseXfo(options => options.SameOrigin());
app.UseReferrerPolicy(opts => opts.NoReferrerWhenDowngrade());

app.UseCsp(options => options
.DefaultSources(s => s.Self()
.CustomSources("data:")
.CustomSources("https:"))
.StyleSources(s => s.Self()
.CustomSources("www.google.com","platform.twitter.com","cdn.syndication.twimg.com","fonts.googleapis.com")
.UnsafeInline()
)
.ScriptSources(s => s.Self()
.CustomSources("www.google.com","cse.google.com","cdn.syndication.twimg.com","platform.twitter.com" ... )
.UnsafeInline()
.UnsafeEval()
)
);

There is one experimental HTTP header that NWebSec doesn't support (yet) called Feature-Policy. It's a way that your website can declare at the server-side "my site doesn't allow use of the webcam." That would prevent a bad guy from injecting local script that uses the webcam, or some other client-side feature.

I'll do it manually both to make the point that I can, but also that you aren't limited by your security library of choice.

NOTE: Another great security library is Andrew Lock's NetEscapades that includes Feature-Policy as well as some other great features.

Here's my single Middleware that just adds the Feature-Policy header to all responses.

//Feature-Policy

app.Use(async (context, next) =>
{
context.Response.Headers.Add("Feature-Policy", "geolocation 'none';midi 'none';notifications 'none';push 'none';sync-xhr 'none';microphone 'none';camera 'none';magnetometer 'none';gyroscope 'none';speaker 'self';vibrate 'none';fullscreen 'self';payment 'none';");
await next.Invoke();
});

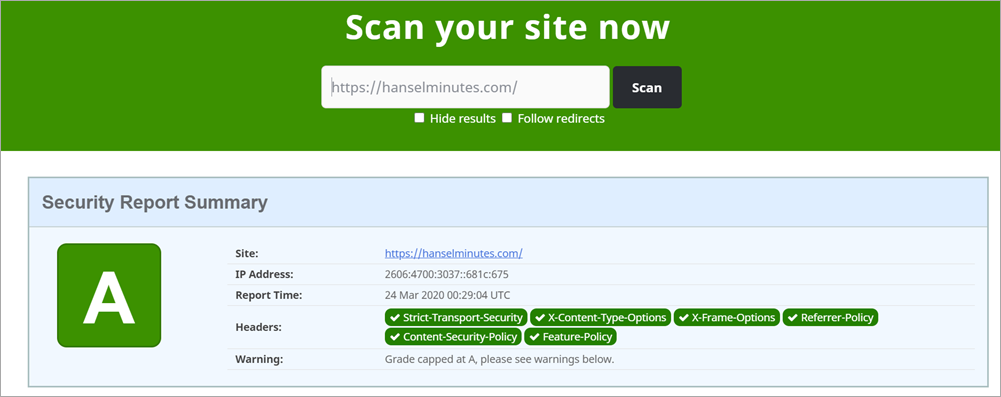
Now I'll commit, build, and deploy (all automatic for me using Azure DevOps) and scan the site again:

Score of A on SecurityHeaders.com

That was pretty straightforward and took less than an hour. Your mileage may vary but that's the general idea!


Sponsor: Protect your apps from reverse engineering and tampering with PreEmptive, makers of Dotfuscator. Dotfuscator has been in-the-box with Microsoft Visual Studio since 2003. Mention HANSELMAN for savings on a professional license!


© 2020 Scott Hanselman. All rights reserved.
     

How to remote desktop fullscreen RDP with just SOME of your multiple monitors

$
0
0

I saw this over on the Microsoft Remote Desktop Uservoice

Allow ability to choose subset of local monitors for RDP session (full screen)

Allow ability to select a subset of current monitors with full screen. Currently can choose all or 1 but cannot choose for instance 2 of 3 (full screen).

That seems useful, I wish it did that. I know about this checkbox that says "Use all my monitors" but I can't say just use 1 and 2 but not 3, right?

Remote Desktop

Turns out that you CAN span n monitors but it's just buried/internal and has no UI.

Save your RDP file, and open it in Notepad. Everyone's RDP file is different but yours may look like this:

full address:s:x.x.x.x:3389
prompt for credentials:i:1
administrative session:i:1
screen mode id:i:2
span monitors:i:1
use multimon:i:1
selectedmonitors:s:0,1

I can put on selectedmonitors:s:x,y and then use the zero-based numbers to indicate my monitors. To get a list of monitors, I can run mstsc /l to LIST out all my monitors on my machine. I can also use mstsc /multimon as a command line to use multiple monitors.

MSTSC /l showing a list of my monitors

So I set my selectedmonitors:0,1 to use my left and middle monitor and skip my right one.

In this picture, I'm RDP'ed into a remote Windows 10 machine in Azure on Monitors 1 and 2 while Monitor 3 is my local one.

RDP on 1,2 and 3 is my local one

Sweet.


Sponsor: Protect your apps from reverse engineering and tampering with PreEmptive, makers of Dotfuscator. Dotfuscator has been in-the-box with Microsoft Visual Studio since 2003. Mention HANSELMAN for savings on a professional license!


© 2020 Scott Hanselman. All rights reserved.
     

A series of new YouTube Videos - Please Subscribe

$
0
0

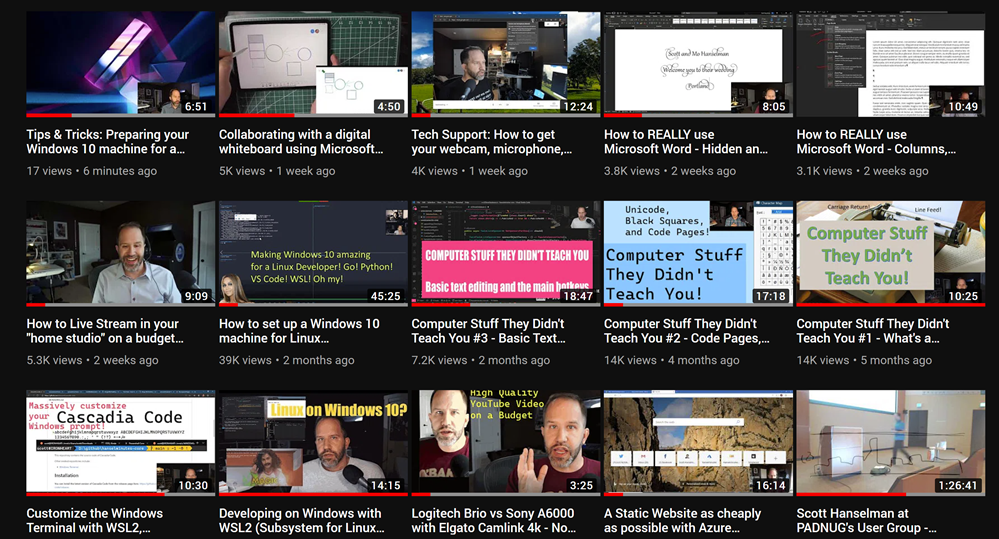
Hey friends, in this time of remoteness, I've been making a lot more YouTube videos and they're pretty decent, IMHO. I'd love it if you'd subscribe, share them, and encourage your friends and colleagues to subscribe as well. Head over to https://youtube.com/shanselman and click Subscribe and then the BELL.

Here's just a taste of the kinds of videos I'm making. My main focus is How-To videos.

Scott's YouTube has a lot of interesting content

I'm enjoying doing videos on topics like:

If you have ideas for videos I can make that could help you out, please let me know in the comments! And subscribe!


Sponsor: This week's sponsor is...me! This blog and my podcast has been a labor of love for over 18 years. Your sponsorship pays my hosting bills for both AND allows me to buy gadgets to review AND the occasional taco. Join me!


© 2020 Scott Hanselman. All rights reserved.
     

The 2020 Guide to Creating Quality Technical Screencasts, Presentations, and Remote Meetings

$
0
0

Being effective when presenting remotelyI've had a lot of people ask me to write up a guide to creating great technical screencasts. This is an update to my 2011 post on the same topic.

What are you doing? STOP and reassert your assumptions

Hang on. You're doing a screencast or sharing your screen in some way for a meeting, presentation, or YouTube. What does that mean and why did I suggest you stop.

This isn't a stage presentation or even a talk in a conference room. Screencasts and remote meetings have an intimacy to them. You're in someone's ear, in their headphones, you're 18 inches from their face. Consider how you want to be seen, how you want to be heard, and what is on your screen.

Try to apply a level of intentionality and deliberate practice. I'm not saying to micromanage, but I am saying don't just "share your screen." Put your empathy hat on and consider your audience and how it'll look and feel for them.

Initial setup and tools

You can use any number of tools for screen capture. They are largely the same. My preferred tool is Camtasia. Other valid tools are CamStudio (a free and open source tool) and Expression Encoder Screen Capture. You can also use OBS to record your screen and webcam.

When you're using Skype/Zoom/Teams to record live, you're already set as those tools will share for you as well as record.

Windows Look at Feel

At the risk of sounding uptight, how you setup Windows and your environment is the difference between a professional and an amateurish screencast. It's shocking how many folks will start recording a screencast without changing a thing, then wonder why their 1600x1200 screencast looks bad on YouTube at 360p or low bandwidth on a phone. If you find yourself doing screencasts a lot, considering making a custom user (maybe named Screencast?) on your machine with these settings already applied. That way you can login as Screencast and your settings will stick.

Resolution and Aspect

First, decide on your aspect ratio. Your laptop may have a ratio of width to height that is 3:2 or 4:3 but MOST people have a 16:9 Widescreen system? A VERY safe resolution in 2020 is 1280x720 (also known as 720p). That means that you'll be visible on everything from a low-end Android, any tablet, up to a desktop.

That said, statistics show that many folks now have 1920x1080 (1080p) capable systems. But again, consider your audience. If I was presenting to a rural school district, I'd use 720 or a lower resolution. It will be smoother and use less bandwidth and you'll never have issue with things being too small. If I was presenting in a professional environment I'd use 1080p. I don't present at 4k, especially if the audience is overseas from where I am. You're pushing millions of pixels that aren't needed, slowing your message and adding no additional value.

On Windows, consider your scale factor. At 1080p, 125% DPI is reasonable. At 720p (or 1366x768, using 100% scaling is reasonable).

Background Wallpaper and Icons

Choose a standard looking background photo. I prefer to use one from http://unsplash.com or the defaults that come with Windows 10 or your Mac. Avoid complex backgrounds as they don't compress well during encoding. Avoid using pictures of your kids or family unless it feeds your spirit and you don't mind mixing the professional and personal. Again - be intentional. I am neither for nor against - just be conscious and decide. Don't just accept the defaults.

Hide your desktop icons. Right click your desktop and hit View | Show Desktop Items. Also consider whether we need to see your desktop at all. If it doesn’t add value, don’t show it on the screencast.

Fonts

Try to use standard fonts and themes. While your preferred font and colors/themes offer personality, they can be distracting. Consider the message you want to present.

If you're using Visual Studio or Visual Studio Code, remember that your audience likely hasn't changed their defaults, and if you show them something fancy, they'll be thinking about how they get that fancy widget rather than your content. In Visual Studio proper, go to Tools | Options | Environment | Fonts and Colors and click "Use Defaults."

In all your text editors, consider change your fonts to Consolas Size 15. It may seem counter-intuitive to have such large fonts but in fact this will make your code viewable even on an iPhone or Tablet. 

Remember, most video sites, including YouTube, restrict the embedded video player size to a maximum of around 560p height, unless you go full-screen or use a pop-out. Use the font size recommended here, and use Camtasia’s zoom and highlight features during editing to call out key bits of code.

Don’t highlight code in the editor by selecting it with the mouse UNLESS you've deliberately change the selection background color. Defaults are typically hard to read editor selections in video. Instead, zoom and highlight in post production, or use ZoomIt and practice zooming and emphasizing on screen elements.

Browser Setup

Unless your screencast is about using different browsers, pick a browser and stick to it. Hide your toolbars, clear your cache, history, and your autocomplete history. You'd be surprised how many inappropriate sites and autocomplete suggestions are published on the web forever and not noticed until it's too late. Don't view pr0n on your screencast machine. Be aware.

Toolbars

Your browser shouldn't show any, and this is a good time to uninstall or hide whatever coupon-offering nonsense or McAffee pixel waster that you've stopped being able to see after all these years. Remember, default is the word of the day. Disable any Browser Extensions that aren't adding value.

If you are using Visual Studio or an IDE (Eclipse, Photoshop, etc) be aware of your toolbars. If you have made extensive customizations to your toolbars and you use them in the screencast, you are doing a great disservice to your audience. Put things to the default. If you use hotkeys, tell the audience, and use them for a reason.

Toast

You've got mail! Yay. Yes, but not during your screencast. Turn off Outlook Gmail, GChat, Twitter, Messenger, Skype, and anything else that can "pop toast" during your screencast.

Clock and Notifications

Go to Start on Windows 10, and search for System Icons and turn off the Clock temporarily. Why? You can't easily edit a screencast if there's a convenient time code in the corner that jumps around during your edits. Also, no one needs to know you're doing your work at 3am.

Clean out your taskbar and notification area. Anything that visually distracts, or just hide the taskbar.

Audio and Voice

Use a decent microphone. I use a Samson C01U. You can also use a USB headset-style microphone but be aware that breathing and "cotton mouth" really shows up on these. Test it! Listen to yourself! Try moving the microphone above your nose so you aren't exhaling onto it directly. Use a pop filter to help eliminate 'plosives (p's and t's). You can get them cheap at a music store.

Be aware of your keyboard clicks. Some folks feel strongly about whether or not your keyboard can be heard during a screencast. Ultimately it's your choice, but you have to be aware of it first, then make a conscious decision. Don't just let whatever happens happen. Think about your keyboard sound, your typing style and your microphone, and listen to it a few times and see if you like how it comes together.

Avoid prolonged silence. There should be ebb and flow of "I'm saying this, I'm doing that" but not 10 seconds of "watch my mouse." Speak in an upbeat but authentic tone. Be real.

Also be calm and quiet. Remember you are a foot from them and you're their ear. It's a conversation with a friend, not a presentation to thousands (even if it is).

Don’t apologize or make excuses for mistakes – either work them in as something to learn from, or remove them completely.

If you are editing the presentation - If you make a mistake when speaking or demonstrating, clap your hands or cough loudly into the mic and wait a second before starting that portion over. When editing, the mistakes will show up as loud audio spikes, making it easy to find them.

Camtasia has decent automatic noise reduction. Use it. You’ll be surprised how much background noise your room has that you, but not your audience, will easily tune out.

If you must overdub a portion of the audio, sit in the same position you did while recording the original, and have the mic in the same spot. You want your voice to blend in seamlessly.

Preferred Video Output for Prerecords

Your screen capture tool should be produced at the highest reasonable quality as it will be compressed later when it's uploaded. Think of it like producing JPEGs. You can make a 5 megabyte JPG, but often a 500k one will do. You can make a 10 gig screen capture if you use uncompressed AVI encoding, but often a high bit rate MP4 will do.

The trick is to remember that your compressed screencast will be recompressed (copies of copies) when it is run through the encoding process.

Edit your screencast, if you do, in its recorded native resolution which hopefully is what you'll publish to as well. That means, record at 1080p, edit at 1080p, and publish at 1080p. Let YouTube or your final destination do the squishing to smaller resolutions.

Personally, I like to know what's going on in my production process so I always select things like "Custom production settings" in Camtasia rather than presets. Ultimately you'll need to try and find what works for you. Use an H.264 encoder with a high bitrate for the video and 44.1kHz/441000Hz 16 bit mono for the audio. Basically make a decently sized MP4 and it should work everywhere.

Do you have enough bandwidth?

In my opinion, if you are doing a live call with Video and Screensharing and you want it to be high definition, you'll need 4 Mbps upstream from your connection. You can check this at http://speedtest.net. If you have 5-6 Mbps you've got a little more headroom. However, if someone in the house decides to get on Netflix, you could have an issue. Know your bandwidth limitations ahead of time. If it's an important stream, can you dedicate your bandwidth to just your one machine? Check out QoS (quality of service) on your router, or better yet, take your kids' iPads away! ;)

Conclusion

Take some time. I put about an hour of work into a 15 min screencast. Your mileage may vary. Watch your video! Listen to it, and have your friends listen to it. Does it look smooth? Sound smooth? Is it viewable on a small device AND a big screen? Does it FEEL good?


Sponsor: Have you tried yet? This fast and feature-rich cross-platform IDE improves your code for .NET, ASP.NET, .NET Core, Xamarin, and Unity applications on Windows, Mac, and Linux.


© 2020 Scott Hanselman. All rights reserved.
     

Quarantine work is not Remote work

$
0
0

Empty streets by clindhartsen used under CCIt's hard. Now, to be clear, if you're working at all in these times, you're very fortunate. I am very fortunate to have a job that lets me work from home. Many of my coworkers, friends, and colleagues have been thrown into remote work - some in a frantic "get your laptop and you're now working from home" moment.

I have written a lot about Remote Work and done a number of podcasts on the topic. I've been working from my home now, full time, for 13 years. It's fair to say that I am an experienced Remote Worker if not an expert.

If you're new to Remote Work and you're feeling some kind of way, I want to say this as an expert in remote working - This thing we are doing now isn't remote work.

Quarantine work !== Remote work

Know that and absorb that and know that you're OK and this thing you're feeling - wow, Remote Works SUCKS! - is normal. You're not alone.

Just look at the replies to this tweet:

People are overwhelmed, afraid, and stressed. There's a background pressure - a psychic weight or stress - that is different in these times. This isn't a problem you can fix with a new webcam or a podcasting mic.

Working from home feels freeing and empowering. Working while quarantined is a luxurious prison.

I've got two kids at home suddenly, one who's had their last year before high school cut short and now we struggle as a couple to work our jobs AND educate the kids in an attempt to create some sense of normalcy and continuity. I applaud the single parents and folks trying to work outside the home AND take care of little ones in these times.

We also feel the guilt of working from home at all. We appreciate the front line workers (my wife is a nurse, my brother a firefighter) who don't have this luxury. The garbagemen and women, the grocery store stockers, truck drivers, food processors, and farmers. We do our best to be thankful for their work while still getting our own jobs done.

What's the point of this post? To remind you, the new remote worker, that this isn't normal. This isn't really representative of remote work. Hang in there, things will hopefully go back to some kind of normal and if we're lucky, perhaps you and I will be able to try out remote working and feel ok about it.

Here's some more resources. Be safe.


Sponsor: Have you tried developing in Rider yet? This fast and feature-rich cross-platform IDE improves your code for .NET, ASP.NET, .NET Core, Xamarin, and Unity applications on Windows, Mac, and Linux.


© 2020 Scott Hanselman. All rights reserved.
     

How to Remote Desktop (RDP) into a Windows 10 Azure AD joined machine

$
0
0

Since everyone started working remotely, I've personally needed to Remote Desktop into more computers lately than ever before. More this week than in the previous decade.

I wrote recently about to How to remote desktop fullscreen RDP with just SOME of your multiple monitors which is super useful if you have, say, 3 monitors, and you only want to use 2 and 3 for Remote Desktop and reserve #1 for your local machine, email, etc.

IMHO, the Remote Desktop Connection app is woefully old and kinda Windows XP-like in its style.

Remote Desktop Connection

There is a Windows Store Remote Desktop app at https://aka.ms/urdc and even a Remote Desktop Assistant at https://aka.ms/RDSetup that can help set up older machines (earlier than Windows 10 version 1709 (I had no idea this existed!)

The Windows Store version is nicer looking and more modern, but I can't figure out how to get it to Remote into an Azure Active Directory (AzureAD) joined computer. I don't see if it's even possible with the Windows Store app. Let me know if you know how!

Windows Desktop Store App

So, back to the old Remote Desktop Connection app. Turns out for whatever reason, you need to save the RDP file and open it in a text editor.

Add these two lines at the end (three if you want to save your username, then include the first line there)

username:s:.\AzureAD\YOURNAME@YOURDOMAIN.com

enablecredsspsupport:i:0
authentication level:i:2

Note that you have to use the style .\AzureAD\email@domain.com

The leading .\AzureAD\ is needed - that was the magic in front of my email for login. Then enablecredsspsupport along with authentication level 2 (settings that aren't exposed in the UI) was the final missing piece.

Add those two lines to the RDP text file and then open it with Remote Desktop Connection and you're set! Again, make sure you have the email prefix.

The Future?

Given that the client is smart enough to show an error from the remote machine that it's Azure AD enabled, IMHO this should Just Work.

More over, so should the Microsoft Store Remote Desktop client. It's beyond time for a refresh of these apps.

NOTE: Oddly there is another app called the Windows Desktop Client that does some of these things, but not others. It allows you to access machines your administrators have given you access to but doesn't allow you (a Dev or Prosumer) to connect to arbitrary machine. So it's not useful to me.
Windows Virtual Desktop

There needs to be one Ultimate Remote Windows Desktop Client that lets me connect to all flavors of Windows machines from anywhere, is smart about DPI and 4k monitors, remotes my audio optionally, and works for everything from AzureAD to old school Domains.

Between these three apps there's a Venn Diagram of functionality but there's nothing with the Union of them all. Yet.

Until then, I'm editing RDP files which is a bummer, but I'm unblocked, which is awesome.


Sponsor: Couchbase gives developers the power of SQL with the flexibility of JSON. Start using it today for free with technologies including Kubernetes, Java, .NET, JavaScript, Go, and Python.


© 2020 Scott Hanselman. All rights reserved.
     

CoreBoy is a cross platform GameBoy Emulator written in C# that even does ASCII

$
0
0

.NET and C# are great languages for programming emulators. Specifically retrogaming and retroarcade emulators. In fact, there's a long history of emulators written in C#. Here's just a few.

Today, David Whitney is deep into writing CoreBoy, a GameBoy Emulator written in C# and .NET Core, using WinForms, and I also spy the Avalonia cross-platform open source WPF-like framework. Head over to https://github.com/davidwhitney/CoreBoy and give the gent a STAR. It even has a headless mode and you could use it as a Library in your own software. Who doesn't want a GameBoy library in their app?

I cloned and built it with http://dot.net Core in just a few minutes. Lovely. I enjoy a clean codebase. Assuming you have a backup of one of the many physical GameBoy games you own like me, you can load a binary dump in CoreBoy as a *.gb or *.gbc file and you'll get something this:

CoreBoy - Zelda Link's Awakening

image

Sweet! Sure it's a little buggy and slow but figuring these things out is the fun of it all! I love that David Whitney is taking us on this journey with him.

There's even already a MonoGame-based graphics surface using DesktopGL and "nilllzz" has it running on Ubuntu!

GameBoy Emulator in C# running on Ubuntu using MonoGame

Emulators are always fun projects to read and learn from. Here, David has a clear separation of concerns between the emulator (handling the CPU, loading instructions, etc.) and the graphics surface that is ultimately responsible for putting pixels on screen.

It looks like he hasn't got it working yet (some issues with command line parsing), but in a few minutes with a little hard-coding I was able to switch to ASCII mode with David's SillyAsciiArtCreator that takes a Pixel and RGB value and maps it to ASCII art that looks awesome in the Windows Terminal.

Zelda in a GameBoy Emulator as ASCII Art

Which is kind of awesome. Why would you do this? BECAUSE YOU CAN

Zelda in a GameBoy Emulator as ASCII Art

I look forward to seeing what comes of this cool new emulator and I'll be reading its code in more detail in the weeks to come! Great stuff, David!


Sponsor: Couchbase gives developers the power of SQL with the flexibility of JSON. Start using it today for free with technologies including Kubernetes, Java, .NET, JavaScript, Go, and Python.


© 2020 Scott Hanselman. All rights reserved.
     

Microsoft Build 2020 registration is not only open, it's FREE, it's LIVE, it's VIRTUAL, and it is all FOR YOU
$
0
0

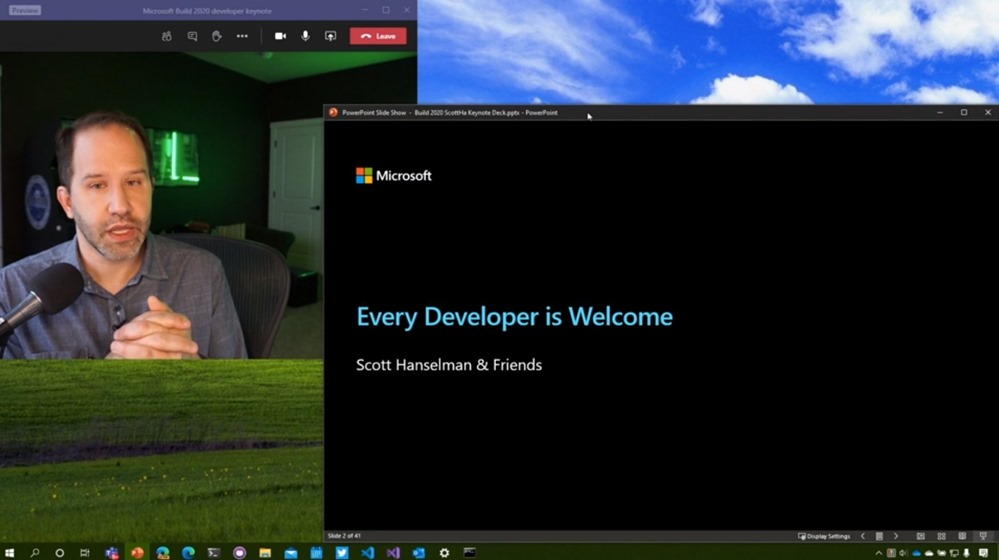
Register for Microsoft BUILDMicrosoft Build 2020 is upon us, registration is open NOW. Stop reading this blog post and go register. I'll wait here.
Done? Sweet.

It's not the Build we thought it would be, but it's gonna be special. It's BUILD. Marketing says not to use ALL CAPS because it's Microsoft Build for them. For me, it's BUILD. It's BUILD at HOME. It's BUILD for YOU. It's BUILD for US. It's VIRTUAL BUILD.

A ton of folks are working hard to make Microsoft Build 2020 something special when it kinda feels like there's not a lot of special stuff happening.

It needs to be about humans as much as tech. More than tech. We build (BUILD!) stuff for each other - that's the whole point and sometimes it takes a situation like the one we're in to be reminded of that.

What are we building for you this year?

Microsoft Build 2020 will be 48 hours starting May 19th at 8am Pacific Time with Satya himself! Then - scandalously - I'm doing the opening keynote with some of my favorite people and wonderful colleagues who will join me in a parade of demos, technical context, continuous learning, innovation, and I'm sure my children will interrupt me even though the calendar is clearly marked BUILD (note the brand-violating ALL CAPS) because "do not disturb" means nothing these days! :)

Starting the 19th we'll kick off...

  • 48 hours of continuous learning
    • There's a TON of LIVE content and everything will be recorded so if you miss something LIVE you can catch up on YOUR schedule.
  • We are in your timezone
    • o    We’re bringing the experts to you – in your time zone! We'll do sessions 3 times (spread out every 8 hours) so you can spend time with the devs and PMs that build the stuff you use every day. No need to stay up until 2am, we'll do it for you. (Don't worry, we'll take the week off after! We're doing this because we love it.)
  • Enhance your learning with LIVE sessions - We'll have shorter and more LIVE sessions and then
    • Those starter sessions then will have longer recorded on-demand sessions to explore after the event. It's Netfl*x for Nerds.
  • Live Q&A with experts
    • Be sure to register (don't be anonymous) so you can do LIVE Q&A with the folks in the know
  • Community connections
    • Sometimes the best track at a conference is the Hallway Track and we want you to spend time with like-minded people in a positive environment so we'll have ways for you to self-organize and step into your own space to share and learn.
  • Registering for the event is your all access pass to all sessions
  • If you're a teacher, we'll even have content for your student and new learners!
  • 48 hour workshops with Build on Twitch
    • For a change of pace and style, we'll have your favorite Live Coders doing long form workshops (1-3 hours) LIVE on Twitch.

Whether you've got 30 min, an hour, or you've cleared your schedule and stay up for a few days with us, I know you'll have a great time. Microsoft Build 2020 will be unlike anything *I've* ever be involved in. I'm working hard with my friends to put together an unprecedented Developer Keynote for an unprecedented situation. Better yet, I get to be the opening act for ScottGu (look Ma, I made it), Rajesh Jha, and other Microsoft luminaries far above my pay grade.

I'm really proud of what we're working on and I'm looking forward to sharing it with you all. You're still reading? Nice. Go register for Microsoft Build 2020 and leave a comment below on what you want to see from us!


This week's blog sponsor: Couchbase gives developers the power of SQL with the flexibility of JSON. Start using it today for free with technologies including Kubernetes, Java, .NET, JavaScript, Go, and Python.


© 2020 Scott Hanselman. All rights reserved.
     

Review: Logitech MX keyboard and mouse - MX Keys and MX Master 3

$
0
0

Logitech makes some beautiful keyboards and mice. Frankly, for me there's just Logitech and Microsoft in the keyboard and mouse game. I've never been a big fan of mechanical keyboards. I like a soft touch and a clear soft key throw.

I've gone back and forth between Microsoft classic keyboards like the Ergo 4000, but for Mice, I've been Team Logitech for YEARS. The MX Master Vertical is a fantastic product. Rock solid, long battery life, great vertical ergonomics, and USB-C to recharge batteries that last over two months. Lovely.

NOTE: Logitech recently give me their latest MX Master series - Keys, Palm Rest, and the 3rd gen MX Master 3 Mouse to review. As is with all the rare times a company sends products for review, I donate the gifted products to a local charter school. If I truly like the product, I will - and do - purchase the products directly with my own money.

Logitech MX Master Mouse

These are premium devices and they have a weight to them that was surprising. I don't mean weight like heavy, more like substantial. The keyboard is about 2 lbs which means it doesn't feel cheap and it'll stay put, but it's not an unruly weight.

The MX Master 3 mouse is 10 ounces and pushes smoothly. I have long ago standardized on the Wow!Pad Graphite Gaming Pad as it's cheap and lasts forever and the MX glides nicely on it with minimal friction. The scroll wheel - they call it magspeed - uses electromagnets and can switch between the clicky ratchet tactile scroll and a disturbingly smooth frictionless scroll. It's a click to switch between them. I like Ratchet for code and Smooth for long form reading. There's a center scroll and clever configurable thumb-scroller.

The mouse is multi-OS and supports Bluetooth, natch, but also the long time Logitech Universal Receiver standard. If you already have a Logitech receiver, adding a new device is trivial.

Logitech MX Master Series

Logitech MX Keys

Let me gush about this keyboard for a second. It's got substance. I don't like a cheap plasticky feel and the MX Keys has a solidity to it, a concreteness that you kinda have to feel to appreciate. It's nearly 2 lbs and I like that. This isn't a cheap keyboard and it doesn't feel cheap. I also expect a keyboard that costs $100 to last for YEARS. I feel this will.

I noticed that the "Windows Key" isn't a Windows key. This is a non-denominational keyboard that loves everyone and every OS. In fact, their Logitech Options (optional) software can even let you move from machine to machine in the same room, copy paste across operating systems, and move the mouse from screen to screen quite happily. So if you, like me, appreciate more than one operating system you'll also appreciate that little detail.

The MX keys basically assumes that you're a multi-computer office and has three dedicated keys to that fact. It, too, charges on USB-C quickly and easily and I just keep a cable around to top off the keyboard and mouse on the rare occasions they need the topping up.

As a touch typist I didn't think I'd care about illuminated keys but it's a lovely accenting touch adds something.

Logitech MX Keys

Frankly my only complaint is that this isn't an ergonomic or split keyboard. If they could just pop it into two pieces that would angle off to either side, it'd be the perfect keyboard. I added the palm rest but it doesn't attach to the keyboard, it is a secondary "along for the ride" floating accessory.

The keys have convex dips that feel nice and your fingers comfortably slip into them. The throw is shallow, more than a laptop, less than a Microsoft Ergo keyboard. The throw is similar to the Microsoft Surface keyboard line, but a bit crisper. They keys are soft and low-profile and sharp, never squishy.

Software

Logitech Options Software is clear and easy to use, unified across the product line and allows you to easily mix and match your new mouse with your old keyboard, or vice versa. Everything can be remapped and customized.

The optional Logitech Flow is similar to long time OSS options like Synergy but takes it to the next level with file-sharing. If you have two or three machines in your office that you regularly need to control (especially if you're mixing Windows and Mac) this may be the perfect keyboard+software solution for you.

Logitech Options Software

I'm very happy with this keyboard and mouse and I'm sold on the mouse already. I'm going to give it another month before I decide to purchase the keyboard. Both are excellent high-end products that you won't go wrong with. Again, the only caveat with the keyboard is that it's not ergo, but that's up to your taste.

The MX Mouse isn't vertical but it's extremely comfortable. If you prefer a right-handed ergo MX option, the MX Vertical Mouse is amazing and long ago replaced my Anker Vertical Mouse. In a word, Logitech's mice are unstoppable.


This week's blog sponsor: Couchbase gives developers the power of SQL with the flexibility of JSON. Start using it today for free with technologies including Kubernetes, Java, .NET, JavaScript, Go, and Python.


© 2020 Scott Hanselman. All rights reserved.
     

Review of the Surface Book 3 for Developers

$
0
0

I was offered a Surface Book 3 to use as a loaner over the the last 5 weeks. I did a short video teaser on Twitter where I beat on the device with a pretty ridiculous benchmark - running Visual Studio 2019 while running Gears of War and Ubuntu under WSL and Windows Terminal. I have fun. ;)

Size and Weight

My daily driver has been a Surface Book 2 since 2017. The new Surface Book 3 is the exact size (23mm thick as a laptop) and weight (3.38 and 4.2 lbs.) as the SB2. I have had to add a small sticker to one otherwise I'd get them confused. The display resolutions are 3000×2000 for the 13.5-inch model and 3240×2160 for the 15-inch one that I have. I prefer a 15" laptop. I don't know how you 13" people do it.

Basically if you are a Surface Book 2 user the size and weight are the same. The Surface Book 3 is considerably more power in the same size machine.

CPU and Memory

They gave me an i7-1065G7 CPU to test. It bursts happily over 3.5 Ghz (see the compiling screenshot below) and in my average usage hangs out in the 2 to 1.8 range with no fan on. I regularly run Visual Studio 2019, VS Code, Teams, Edge (new Edge, the Chromium one), Ubuntu via WSL2, Docker Desktop (the WSL2 one), Gmail and Outlook as PWAs, as well as Adobe Premiere and Audition and other parts of the Creative Suite. Memory usually sits around 14-18 gigs unless I'm rendering something big.

Task Manager with a Surface Book 3

It's a 10th gen Intel chip and as the Surface Book 3 can detach the base from the screen, it's both a laptop and tablet. I gleaned from Anandatech that TDP is between 10 and 25W (usually 15W) depends on what is needed, and it shifts frequencies very fast. This is evident in the great battery life when doing things like writing this blog post or writing in Edge or Word (basically forever) versus playing a AAA game or running a long compile, building containers, or rendering a video in Premiere (several hours).

FLIP THE SCREEN AROUND? You can also when docked even reverse the screen! Whatever do you mean? It's actually awesome if you want an external keyboard.
Flip the screen around

All this phrased differently? It's fast, quickly, when it needs to be but it's constantly changing the clock to maximize power/thermals/battery.

SSD - Size and Speed

The device I was loaned has a Toshiba KXG60PNV2T04 Hard Drive 2TB NVMe M.2 that's MASSIVE. I'm used to 512G or maaybe a 1TB drive in a Laptop. I'm getting used to never having to worry about space. Definitely 1TB minimum these days if you want to play games AND do development.

I ran a CrystalBenchmark on the SSD and it did 3.2GB/s sequential reads! Sweet. I feel like the disk is not the bottleneck with my development compile tests below. When I consulted with the Surface team last year during the conception of the Surface Book 3 I pushed them for faster SSDs and I feel that they delivered with this 2TB SSD.

GPU - Gaming and Tensorflow

The 13.5-inch model now comes with an NVIDIA GeForce GTX 1650 Max-Q GPU with 4GB of GDDR5 memory in its Core i7 variant, while the 15-inch unit features a NVIDIA GeForce GTX 1660 Ti Max-Q with 6GB of GDDR6 memory. When running the Gears 5 Benchmark while plugged in (from the Extras menu, Benchmark) is has no issues with the default settings doing 60fps for 90% of the benchmark with a few dips into the 57 range depending what's on screen.

It's not a gaming machine, per se, but it does have a NVIDIA GeForce GTX 1660 Ti so I'm basically able to 1080p 60fps AAA games. I've played Destiny 2, Gears of War 5, and Call of Duty Modern Warfare on default settings at 60 fps without issue. The fan does turn on but it's very manageable. I like that whenever we get back into hotels I'll be able to play some games and develop on the same machine. The 15" also includes an Xbox Wireless Adapter so I just paired my controller with it directly.

Gears at 60fps

I was also able to run Tensorflow with CUDA on the laptop under Windows and it worked great. I ran a model against some video footage from my dashcam and 5.1 gigs of video RAM was used immediately and the CUDA engine on the 1660Ti is visible working in Taskman. The commercial SKU has an NVIDIA Quadro RTX 3000 that is apparently even more tuned for CUDA work.

NVidia CUDA engine is engaged

Developer Performance

When I built my Intel i9 Ultimate Desktop 3.0 machine and others, I like to do compile tests to get a sense of how much you can throw at machine. I like big project compiles because they are a combination of a lot of disk access and a lot of parallel CPU work. However, some projects do have a theoretical maximum compile speed because of the way the dependences flesh out. I like to use Orchard Core for benchmarks.

Orchard Core is a fully-featured CMS with 143 projects loaded into Visual Studio. MSBUILD and .NET Core supports both parallel and incremental builds.

  • A warm build of Orchard Core on IRONHEART my i9 desktop takes just under 10 seconds.
    • My 6 year old Surface Pro 3 builds it warm in 62 seconds.
  • A totally cold build (after a dotnet clean) on IRONHEART takes 33.3 seconds.
    • My Surface Pro 3 builds it cold in 2.4 minutes.

I'll do the same build on both my Surface Book 2 and this new Surface Book 3 to compare. I've excluded the source folders from Defender as well as msbuild.exe and dotnet.exe. I've also turned off the Indexer.

  • A cold build (after a dotnet clean) on this Surface Book 3 takes 46 seconds.
    • A warm build is 16.1 seconds
  • A cold build (after a dotnet clean) on my Surface Book 2 takes 115 seconds.

It's WAY faster than my Surface Book 2 which has been my daily driver when mobile for nearly 3 years!

Benchmarks are all relative and there's raw throughput, there's combination benchmarks, and all kinds of things that can "make a chart." I just do benchmarks that show if I can do a thing I did before, faster.

.NET working hardAll the CPUs are working

You can also test various guesses if you have them by adding parameters to dotnet.exe. For example, perhaps you're thinking that 143 projects is thrashing to disk so you want to control how many CPUs are used. This has 4 physical cores and 8 logical, so we could try pulling back a little

dotnet build /maxcpucount:4

The result with Orchard Core is the same, so there is likely a theoretical max as to how fast this can build today. If you really want to go nuts, try

dotnet build -v diag

And dig through ALL the timing info!

Webcam Quality

Might be odd to add this as its own section but we're all using our webcams constantly right now. I was particularly impressed with the front-facing webcam. A lot of webcams are 720p with mediocre white balance. I do a lot of video calls so I notice this stuff. The SB3 has a 1080p front camera for video and decent light pickup. When using the Camera app you can do up to 5MP (2560x1920) which is cool. Here's a pic from today.

WIN_20200514_15_16_32_Pro

Ports and Power and Sound and Wi-Fi

The Surface Book 3 has just one USB-C port on the right side and two USB 3.1 Gen 2s on the left. I'd have liked one additional USB-C so I could project on stage and still have one additional USB-C available...but I don't know what for. I just want one more port. That said, the NEW Surface Dock 2 adds FOUR USB-C ports, so it's not a big deal.

It was theoretically possible to pull more power on the SB2 than its power supply could offer. While I never had an issue with that, I've been told by some Destiny 2 players and serious media renderers that it could happen. With the SB3 they upped the power supply with 65W for the base 13.5-inch version and a full 127W for the 15-inch SKUs so that's not an issue any more.

I have only two Macs for development and I have no Thunderbolt devices or need for an eGPU so I may not be the ideal Thunderbolt consumer. I haven't needed it yet. Some folks have said that it's a bummer the SB3 doesn't have it but it hasn't been an issue or sticking point for any of my devices today. With the new Surface Dock 2 (below) I have a single cable to plug in that gives me two 4k monitors at 60Hz, lots of power, 4 USB-C ports all via the Dock Connector.

I also want to touch on sound. There is a fan inside the device and if it gets hot it will run. If I'm doing 1080p 60fps in Call of Duty WarZone you can likely hear the fan. It comes and goes and while it's audible when it's one, when the CPU is not maxed out (during 70% of my work day) the Surface Book 3 is absolutely silent, even when running the monitors. The fan comes on with the CPU is bursting hard over 3Ghz and/or the GPU is on full blast.

One other thing, the Surface Book 3 has Wi-Fi 6 even though I don't! I have a Ubnt network and no Wi-Fi 6 mesh points. I haven't had ANY issues with the Wi-Fi on this device over Ubnt mesh points. When copying a 60 gig video file over Wi-Fi from my Synology NAS I see sustained 280 megabit speeds.

The New Surface Dock - Coming May 26th

I'm also testing a pre-release Surface Dock 2. I suspect they wanted me to test it with the Surface Book 3...BUT! I just plugged in every Surface I have to see what would happen.

My wife has a Surface Laptop 2 she got herself, one son has my 6 year old old Surface Pro 3 while the other has a Surface Go he got with his allowance. (We purchased these over the last few years.) As such we have three existing Surface Docks (original) - One in the kids' study/playroom, one in the Kitchen as a generalized docking station for anyone to drop in to, and one in my office assigned me by work.

We use these individual Surfaces (varying ages, sizes, and powers) along with my work-assigned Surface Book 2 plus this loaner Surface Book 3, so it's kind of a diverse household from a purely Surface perspective. My first thought was - can I use all these devices with the new Dock? Stuff just works with a few caveats for older stuff like my Surface Pro 3.

RANDOM NOTE: What happens when you plug a Surface Pro 3 (released in 2014) into a Surface Dock 2? Nothing, but it does get power. However, the original Surface Dock is great and still runs 4096 x 2160 @30Hz or 2960 x 1440 @60Hz via mini DisplayPort so the Pro 3 is still going strong 6 years out and the kids like it.

So this Surface Dock 2 replaces the original Dock my office. The Surface Dock 2 has

  • 2x front-facing USB-C ports (I use these for two 4k monitors)
  • 2x rear-facing USB-C ports
  • 2x rear-facing USB-A 3.2 (10Gbps) ports
  • 1x Gigabit Ethernet port
  • 1x 3.5mm audio in/out port
  • Kensington lock slot - I've never used this

First, that's a lot of USB-C. I'm not there yet with the USB-C lifestyle, but I did pick up two USB-C to full-size DisplayPort cables at Amazon and I can happily report that I can run both my 4k monitors at 60hz plus run the main Surface Book 3 panel. The new Dock and its power supply can push 120 watts of power to the Surface with a total of 199 watts everything connected to the dock. I've got a few USB-C memory sticks and one USB-C external hard drive, plus the Logitech Brio is USB 3, so 6 total ports is fine with 4 free after the two monitors. I also Gigabit wired the whole house so I use the Ethernet port quite happily.

Initially I care about one thing - my 4k monitors. Using the USB-C to DisplayPort cables I plugged the dock into two Dell P2715Q 4ks and they work! I preferred using the direct cables rather than any adapters, but I also tested a USB-C to HDMI 2.0 adapter I got in 2018 with some other Dell monitors in the house and that worked with the Surface Book 3 as it had previously with the Book 2.

SURPRISE NOTE: How does the super-thin Surface Pro X do when plugged into a Surface Dock 2? Amazing. It runs two 4k monitors at 60 Hz. I don't know why I was shocked, it's listed on the support page. It's a brand new device, but it's also the size and weight of an iPad so I was surprised. It's a pretty amazing little device - I'll do another post on just the ARM-based Surface Pro X another time.

One final thing about the new Dock. The cable is longer! The first dock had a cable that was about 6" too short and now it's not. It's the little things and in this case, a big thing that makes a Dock that much nicer to use.

Conclusion

All in all, I'm very happy with this Surface Book 3 having been an existing Surface Book 2 user. It's basically 40-50% faster, the video card is surprisingly capable. The SSD is way faster at the top end. It's a clear upgrade over what I had before, and when paired with the Surface Dock 2 and two 4k monitors it's a capable developer box for road warriors or home office warriors like myself.


Sponsor: Have you tried developing in Rider yet? This fast and feature-rich cross-platform IDE improves your code for .NET, ASP.NET, .NET Core, Xamarin, and Unity applications on Windows, Mac, and Linux.


© 2020 Scott Hanselman. All rights reserved.
     

Windows PowerToys FancyZones is the essential window manager for Windows 10

$
0
0

Last year Microsoft rebooted PowerToys and it's open source and on GitHub. It's a few months later and PowerToys is getting even better. You can download and install it from https://github.com/microsoft/powertoys releases.

FancyZones is one of the highlights of PowerToys. I'll do other blog posts on the other awesome apps and applets, but FancyZones is special.

Fancy Zones Editor

FancyZone is a Windowing Manager for Windows, ahem. That means it helps you MOVE AND SNAP your windows to known regions, which is way easier than MOVE AND ENDLESSLY FIDDLE WITH your windows.

You likely have a limited number of things you do with your machine - believe it or not - and you likely find yourself in a finite number of "layouts." You likely do this naturally but you're wasting time getting your windows into those configurations.

Default Fancy Zones layouts

FancyZones solves all that. You may a layout or layouts and then shift drag your windows to a zone and they pop/snap into place.

It's absolutely essential for large monitors and once you get used it to you'll be hooked. Go get all the open source PowerToys here https://github.com/microsoft/PowerToys/releases


Sponsor: Have you tried developing in Rider yet? This fast and feature-rich cross-platform IDE improves your code for .NET, ASP.NET, .NET Core, Xamarin, and Unity applications on Windows, Mac, and Linux.


© 2020 Scott Hanselman. All rights reserved.
     

Developing on Docker with the new and improved Visual Studio Container Tools (and WSL2)

$
0
0

I've been spending a lot of time with Docker lately. Docker Desktop on Windows is great and getting better every day. Now that WSL2 (Windows Subsystem for Linux) is rolling out stable over the coming weeks and Docker Desktop supports WSL to host Linux containers directly, I'm finding myself using Visual Studio to develop my sites under Docker.

Visual Studio Container Tools are actively improving as well and the latest release is pretty sweet. You likely already HAVE this as the Containers tool window is now included in Visual Studio 2019 starting with version 16.4 Preview 2 and above!

NOTE: Be sure to check out the Visual Studio Code Docker Extension as well!

First thing that is impressive is that Visual Studio now tries to help you get to a successful place with helpful guidance, as sometimes set up can be daunting.

When you create or open a Docker-enabled project:

  • VS container tools help you install Docker Desktop
  • VS container tools make sure Docker Desktop is running

Start Docker Desktop?

You've got the Container Tools already if you've installed the Web or Azure Workload in Visual Studio 2019 and it is included in the free Visual Studio 2019 Community!

You can Docker-enable a project with a checkbox when you create it OR you can right click Add Docker Support after the fact.

Enable Docker Support

When working with .NET Core the Container Tools will make a great multi-stage Dockerfile that encapsulates best practices. It uses Docker layering to build within Docker using the .NET SDK but then publishing into a smaller runtime container for the smallest possible resulting image for maximum density.

Multistage Dockerfile

Multi-container Debugging

Debugging real systems with multiple containers has been a challenge in the past. VS2019 now has Container Orchestrator Support built-in. This screenshot shows Docker Compose appearing itself as a Debug Target within the standard VS2019 toolbar!

Docker Compose

Once you have a bunch of containers running, the Containers Tool finds a nice balance between showing you the text logs and getting out of your way but also giving you a GUI to start and stop and manage multiple running containers.

You can see below the images I have, the Solution Containers. I can even right click and Attach to Process within a running Linux container! Again, all using WSL2 and wicked fast.

Docker Container Tools

Coming soon to Visual Studio! Native WSL2 debugging

I like my containers BUT if you just want to dev on Linux directly (no containers) then this is one of the "coming soons" that you'll be the most excited about - WSL 2 Debugging! Coming soon to the Marketplace as a preview with a plan to ship in future Visual Studio tooling releases, you'll be able to just select WSL2 (Linux) as a compilation and debug target! That means dev/test/run native Linux on Windows right from VS.

Remember that WSL2 uses a real Linux kernel so there's no emulators here. The WSL2 Linux starts up in about a second and you'll be debugging FAST. WSL2 is rolling out now!

WSL2 in Visual Studio

That means breakpoints and full debugging on Linux from Visual Studio 2019 on Windows. Scott Hunter and I talked about this and showed a demo in our "Journey to One .NET" talk at BUILD this year that you can watch free here!

If you want all these nice Container Tools either install VS2019 or just run the Visual Studio Installer and UPDATE your existing installation.


Sponsor: This week's sponsor is...me! This blog and my podcast has been a labor of love for over 18 years. Your sponsorship pays my hosting bills for both AND allows me to buy gadgets to review AND the occasional taco. Join me!


© 2020 Scott Hanselman. All rights reserved.
     

Mirroring your Presence Status from the Microsoft Graph in Teams to LIFX or Hue bias lighting

$
0
0

During the Microsoft Build keynote last week - that you can watch free online here - we snuck in a LOT of detail and easter eggs. We planned the whole thing out like a live stage play (I have a background in theatre) and one of the things that mattered to me was lighting.

If you're going to watch something you for an extended time you'll need a little visual interest. Ya gotta mix it up! So I partnered with LIFX and Isaac Levin to accomplish two things:

  • Can we change room lighting to match Teams/Skype/Slack/Whatever presence status?
  • Can we change room lighting to match the Windows Theme/Background accent color?
    • If I'm not mirroring my pretense status, pull the accent color out and change the light.

Here's what it looked like in the keynote:

Purple light and Purple background
Green light and green background

The PresenceLight app is open source and up on Github by Isaac Levin and you can get it on the Windows Store free or in Chocolatey, WinGet, or download a nightly build.

So what's needed? We need an API to pull presence from and an API to push our chosen color to. So that's the Microsoft Graph that includes presence APIs. On the lighting side, using LIFX as an example, they have a great clean LIFX HTTP API.

RANDOM: If you're looking for my wallpapers from the BUILD keynote, I've put them up here.

Here's what the app looks like. You can auth against Phillips Hue, Yeelight or LIFX. The code for LIFX, as an example, is very clean.

PresenceLight

Check out Isaacs detailed blog post about PresenceLight with code samples and explanations! The LIFX folks also set up a 10% off coupon "BUILD" for use on their online store. I'm sure they'll sell out, but the LIFX Beam that I have is $99 refurbished.


Sponsor: This week's sponsor is...me! This blog and my podcast has been a labor of love for over 18 years. Your sponsorship pays my hosting bills for both AND allows me to buy gadgets to review AND the occasional taco. Join me!


© 2020 Scott Hanselman. All rights reserved.
     

Easily rename your Git default branch from master to main

$
0
0

The Internet Engineering Task Force (IEFT) points out that "Master-slave is an oppressive metaphor that will and should never become fully detached from history" as well as "In addition to being inappropriate and arcane, the master-slave metaphor is both technically and historically inaccurate." There's lots of more accurate options depending on context and it costs me nothing to change my vocabulary, especially if it is one less little speed bump to getting a new person excited about tech.

However, I've dozens of git repositories that have 'master' as the main branch. Changing that would be a hassle right?

image

Let's see. I'll just "git branch -m master main" and then push it back! Remember that -m is --move so your history isn't changed! Even better I can "git push -u origin main" to set the upstream at the same time.

D:\github\WindowsTerminalHere [master]

> git branch -m master main
D:\github\WindowsTerminalHere [main]
> git push -u origin main
Total 0 (delta 0), reused 0 (delta 0)
remote:
remote: Create a pull request for 'main' on GitHub by visiting:
remote: https://github.com/shanselman/WindowsTerminalHere/pull/new/main
remote:
To https://github.com/shanselman/WindowsTerminalHere.git
* [new branch] HEAD -> main

That was easy.

NOTE: Changing the default branch to "main" also has the benefit of starting with "ma" so that autocomplete <TAB> muscle memory still works. Another great option for your main github branch is "latest." The goal is to just be unambiguous.

Now I just need to change my default branch in my GitHub settings for my repository.

image

I can also update the tracking branch manually as seen here, but if you use git push -u origin main it'll do both.

git branch -u origin/main main

The last thing to think about is if you have a CI/CD, GitHub Action, Azure DevOps pipeline or some other build system that pulls a specific branch. You'll just change that to main. However, usually unless your CI explicitly calls for a branch by name, changing master to main will "just work!"

NOTE: For more complex repos also check your protected branch rules.

image

This is because -m is --move and all your reflog is unchanged!

TL;DR in conclusion:

git branch -m master main

git push -u origin main

Updating local clones

If someone has a local clone, then can update their locals like this:

$ git checkout master

$ git branch -m master main
$ git fetch
$ git branch --unset-upstream
$ git branch -u origin/main
$ git symbolic-ref refs/remotes/origin/HEAD refs/remotes/origin/main

From the tweet above (Thanks Brad from XUnit.net!), these steps

  1. Go to the master branch
  2. Rename master to main locally
  3. Get the latest commits from the server
  4. Remove the link to origin/master
  5. Add a link to origin/main
  6. Update the default branch to be origin/main

Hope this helps! Other good names are latest, trunk, and stable!


Sponsor: Have you tried developing in Rider yet? This fast and feature-rich cross-platform IDE improves your code for .NET, ASP.NET, .NET Core, Xamarin, and Unity applications on Windows, Mac, and Linux.


© 2020 Scott Hanselman. All rights reserved.
     

The Importance of Nesting when Remote Working and Quarantine Working

$
0
0

We've all learned the hard way that Quarantine work is not Remote work. It doesn't feel the same because it's not the same. It's a hard time right now and tension is high.

"People are overwhelmed, afraid, and stressed. There's a background pressure - a psychic weight or stress - that is different in these times. This isn't a problem you can fix with a new webcam or a podcasting mic."

I really believe that self-care is important and one should be as deliberate as one can in how they live.

One day we were working in the office and the next day we were home indefinitely. Some in spare bedrooms, most in our kitchens, laundry rooms, garages and front porches.

What does "nesting" mean?

Nesting is not just what a bird does to prepare their space for the coming family, it's also what we can do as humans to make a space for ourselves to be successful. It's the deliberate practice of setting up your work area so that you can be successful and fulfilled.

Your space doesn't need to be fancy. Nesting isn't blinging your space or making it look expensive - nesting is making it YOURS.

  • Can you sit and work comfortably? Is your space ergonomic as it can be?
    • Is your monitor or laptop angled in a way that doesn't cause eyestrain or neck strain?
  • Do the things around you feed your spirit? Toys? Gadgets? Family pics? Post-It Notes?
    • Be intentional. Don't just let your space happen. What is calming for you? What's productive? Do you like a nice whiteboard?
    • Perhaps a fresh notebook can de-stress you? Your office can be a Zen garden. Does clutter calm? Fill it with fun. Do you like open space? Clear your desk.
  • What's your lighting situation?
    • Do you have natural light or a window nearby? Maybe you should.

Stop for a second. Perhaps while reading this blog post. Look around and ask yourself - why is this space like this? How did it get this way and do I feel good here. What can you do? Maybe it's just straightening up. Perhaps literally just turning another direction to adjust light.

This is the start of a process to make your space you own. You can't control your quarantine situation but you can be intentional about your nest.

What have YOU done to make your space your own? How are you nesting?


Sponsor: Have you tried developing in Rider yet? This fast and feature-rich cross-platform IDE improves your code for .NET, ASP.NET, .NET Core, Xamarin, and Unity applications on Windows, Mac, and Linux.


© 2020 Scott Hanselman. All rights reserved.
     

Using the Blockly visual programming editor to call a .NET Core WebAPI

$
0
0

I like to showcase interesting and cool open source projects that need more attention! Go give our friend a star on GitHub! NetCoreBlockly on GitHub is clever and fun!

Blockly is a JavaScript library for building visual programming editors. If you've used languages like Scratch you've seen block-style programming environments. The picture below shows you a demo of calling a .NET Core WebAPI using Blockly code!

Remember that once you have a WebAPI you can make it available in a number of ways. The "projection" of the methods that the WebAPI makes available can be presented visually, as Swagger/OData/GraphQL, however you like. Another project is WebAPI2CLI that lets you call WebAPI endpoints easily from a CLI (Command Line Interface) that is more high fidelity than curl or wget.

.NET Core as a Blockly Editor

What .NET Core Blockly is doing is looking at the projection/interface of your WebAPI and generating Blockly blocks! That means that anyone (business users, student, tester, whatever) could try out your WebAPI with a simple drag and drop interface in their browser!

You can pull in Swagger, OData, or GraphQL interfaces.

I love seeing fun projects like this that make the web (and .NET code) easier to use! Go give them some stars and get involved!


Sponsor: Upgrade from file systems and SQLite to Actian Zen Edge Data Management. Higher Performance, Scalable, Secure, Embeddable in most any programming language, OS, on 64-bit ARM/Intel Platform.


© 2020 Scott Hanselman. All rights reserved.
     

You're tired because your lizard brain knows that Zoom meetings aren't natural

$
0
0

Remote work isn't normal. It's great when it's not quarantine work, to be clear. I've worked remotely with success for over 13 years and written about it extensively. I'm pro-remote work. But.

Doing zoom calls all day can be super productive but they are also physically and emotionally exhausting. One of the reasons that isn't helping you is that a zoom meeting isn't a natural human state - it's a simulation of one and your body knows the truth.

I'm using "Zoom" the brand here as a pervasive generic verb like folks use Kleenex for tissue or Google for any websearch. I zoom with Teams and google with Bing, for example. You get the idea.

So what do I mean when I say "remote work isn't normal?" Why such a declarative statement? Because I'd propose that our lizard brains know that we're talking to ourselves, alone in a room.

"The brain stem, the cerebellum, and the basal ganglia – commonly known as “the lizard brain” because it’s the part we inherited from our reptilian predecessors – are responsible for fight or flight responses, fear, suspicion, and anxiety. The lizard brain kept our ancestors safe when a panther pounced from a limb just overhead. In an ironic twist, these most ancient parts of the brain are making it difficult for us to think rationally at a time when rational thought is key to our survival." - Courier Journal

Your body knows the people aren't there. Their electricity isn't in the room with you. They are flat. All their voices come from one point in space, not from all over the room. There is no sense of space. Even worse if you have headphones. They are 3 inch tall tiny talking heads while their voices are 1 inch from your ears. There's a strange detached intimacy where you're both closely connected to the group virtually while utterly disengaged physically.

Teams and Zoom calls aren't natural

A Brady Bunch grid of faces is not what the brain expects when you're having a meeting, so we're constantly fighting against the cognitive dissonance, the background process load, the psychic weight, that we ARE in the same room talking with our co-workers.

Your conscious brain says you're having a chat in a room with a dozen of your co-workers but the unconscious brain says you're not. It's small but I'd propose it's there. Doing this for hours and hours can give you the same kind of unease that you get from flying in a plane. You get off the plane and you're exhausted from sitting. Sure there's humidity and oxygen issues but there's also the "you know you're moving but parts of your brain disagrees" cognitive load that can't be ignored.

Remote video group calls are an amazing enabling technology but it's also enabling to acknowledge that they can be draining. That simple acknowledgement - huh, that's a thing! - is itself empowering. If you name it you can claim it. It's not just you!


Sponsor: Upgrade from file systems and SQLite to Actian Zen Edge Data Management. Higher Performance, Scalable, Secure, Embeddable in most any programming language, OS, on 64-bit ARM/Intel Platform.


© 2020 Scott Hanselman. All rights reserved.
     
Viewing all 1148 articles
Browse latest View live


<script src="https://jsc.adskeeper.com/r/s/rssing.com.1596347.js" async> </script>