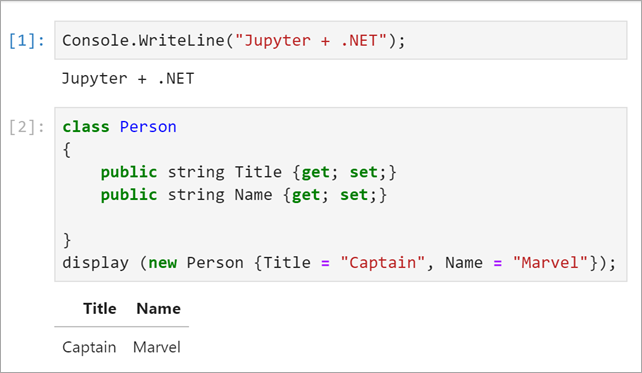
Jupyter Notebooks has been the significant player in the interactive development space for many years, and Notebooks have played a vital role in the continued popularity of languages like Python, R, Julia, and Scala. Interactive experiences like this give users with a lightweight tool (I like to say "interactive paper") for learning, iterative development, and data science and data manipulation.
Try .NET has grown to support more interactive experiences across the web with runnable code snippets, an interactive documentation generator for .NET Core with the dotnet try global tool, so it makes sense that we take it to the next level, so we're announcing today:
.NET in Jupyter Notebooks
Even better you can start playing with it today, locally or in the cloud!
.NET in Anaconda locally
- .NET Core 3.0 SDK and 2.1 as currently the
dotnet tryglobal tool targets 2.1. - Jupyter : JupyterLab can be installed using Anaconda or
condaorpip.- For more details on how to do this please checkout the offical Jupyter installation guide.
Install the .NET Kernel
- Open Anaconda Prompt (Installed with Anaconda
- Install the dotnet try global tool
dotnet tool install --global dotnet-try
Please note: If you have the dotnet try global tool already installed, you will need to uninstall the older version and get the latest before grabbing the Jupyter kernel-enabled version of the dotnet try global tool.
-
Check to see if Jupyter is installed
jupyter kernelspec list -
Install the .NET kernel!
dotnet try jupyter install![dotnet try jupyter install dotnet try jupyter install]()
-
Test installation
jupyter kernelspec listYou should see the
.net-csharpand.net-fsharplisted.

-
To start a new notebook, you can either type
jupyter labAnaconda prompt or launch a notebook using the Anaconda Navigator. -
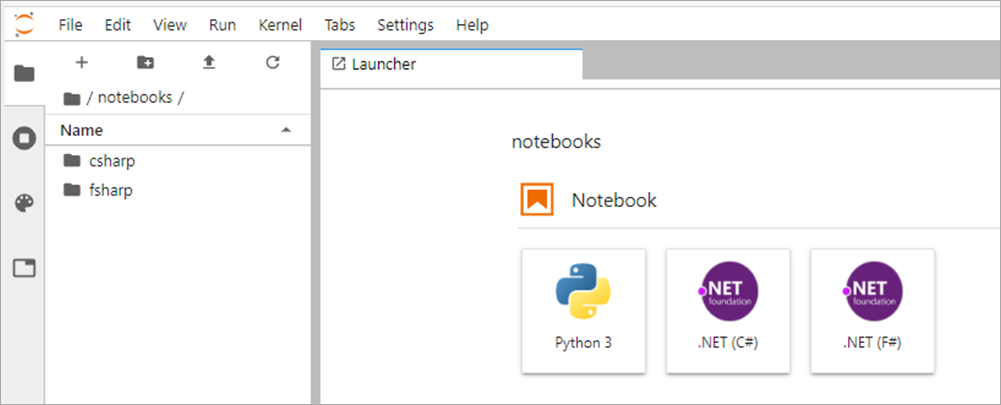
Once Jupyter Lab has launched in your preferred browser, you have the option to create a C# or a F# notebook
-
Now you can write .NET and and prose side by side, and just hit Shift-Enter to run each cell.
![Example C# code in Jupyter Notebooks Example C# code in Jupyter Notebooks]()
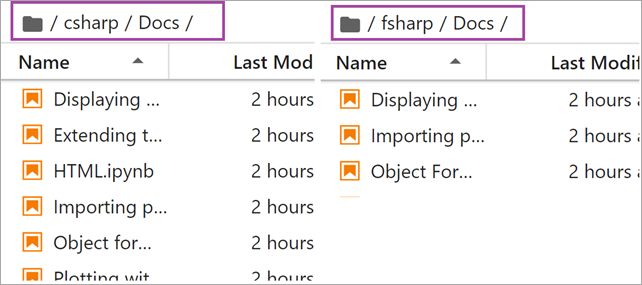
For more information on our APIs via C# and F#, please check out our documentation on the binder side or in the dotnet/try repo in the NotebookExamples folder.
Features
To explore some of the features that .NET notebooks ships with, I put together dashboard for the Nightscout GitHub repo.
HTML output : By default .NET notebooks ship with several helper methods for writing HTML. From basic helpers that enable users to write out a string as HTML or output Javascript to more complex HTML with PocketView. Below I'm using the display() helper method.

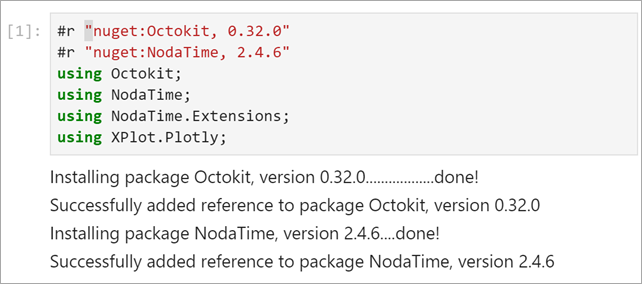
Importing packages : You can load NuGet packages using the following syntax. If you've used Rosyln-powered scripting this #r for a reference syntax will be familiar.
#r "nuget:<package name>,<package version>"
For Example
#r "nuget:Octokit, 0.32.0"
#r "nuget:NodaTime, 2.4.6"
using Octokit;
using NodaTime;
using NodaTime.Extensions;
using XPlot.Plotly;
Do note that when you run a cell like this with a #r reference that you'll want to wait as that NuGet package is installed, as seen below with the ... detailed output.
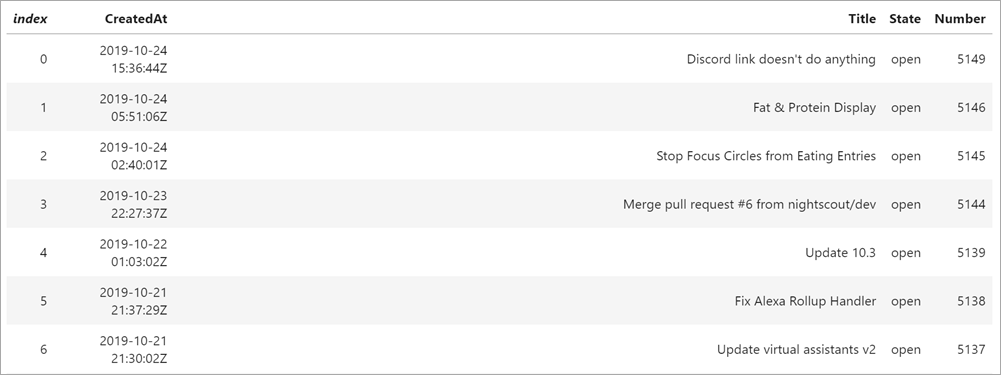
Object formatters : By default, the .NET notebook experience enables users to display useful information about an object in table format.
The code snippet below will display all opened issues in the nightscout/cgm-remote-monitor repo.
display(openSoFar.Select(i => new {i.CreatedAt, i.Title, State = i.State.StringValue, i.Number}).OrderByDescending(d => d.CreatedAt));
With the object formatter feature, the information will be displayed in a easy to read table format.
Plotting
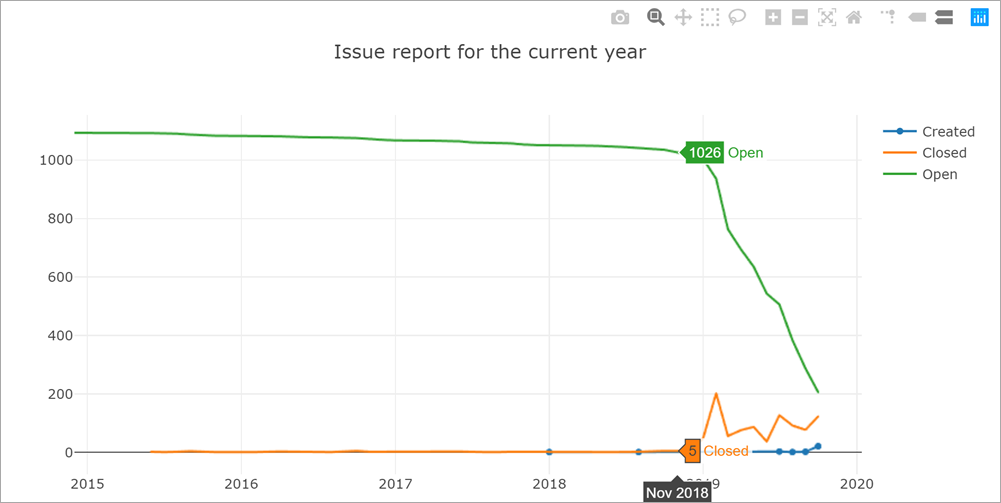
Visualization is powerful storytelling tool and,a key feature of the Jupyter notebook experience. As soon as you import the wonderful XPlot.Plotly F# Visualization Package into your notebooks(using Xplot.Ploty;) you can begin creating rich data visualizations in .NET.
The graphs are interactive too! Hover over the different data points to see the values.
Learn, Create and Share
To learn, create and share .NET notebooks please check out the following resources:
- Learn: To learn online checkout the dotnet/try binder image for a zero install experience.
- Create: To get started on your machine check out the dotnet/try repo. Select the option highlighted option
![68223835-86614680-ffbb-11e9-9161-bcafd6c3133d 68223835-86614680-ffbb-11e9-9161-bcafd6c3133d]()
- Share: If you want to share notebooks you have made using the .NET Jupyter kernel, the easiest way is to generate a Binder image that anyone can run on the web. For more information on how to do this please check out the .NET Jupyter documentation.
Checkout the online .NET Jupyter Notebook I created for to explore the NightScout GitHub project using C# and the Octokit APIs.
- The source is here https://github.com/shanselman/NightscoutDashboard
- but you can run the notebook live just by going to mybinder https://mybinder.org/v2/gh/shanselman/NightScoutDashboard/master?urlpath=lab
We hope you enjoy this new .NET Interactive experience and that you're pleasantly surprised by this evolution of the .NET Try interactive kernel.
Sponsor: Octopus Deploy wanted me to let you know that Octopus Server is now free for small teams, without time limits. Give your team a single place to release, deploy and operate your software.
© 2019 Scott Hanselman. All rights reserved.

