It's amazing that I can basically be my own IT Department. The kinds of things we can do in our homes as individuals with off-the-shelf hardware would have needed an IT Dept of a dozen just 10 years ago, ya know? Amazing.
I wanted to be able to VPN into my home and remotely access my machines and files. I do very much realize there are a lot of different options to do this, and have been for years. From GoToMyPc to Hamachi, again, there's dozens of ways. I wanted a VPN solution I could use on my iPhone/iPad and Surface. I wanted it to be standards-based and not require any additional software installations.
I have a a Synology 1511+ NAS appliance and I love it. It's not just a file server, it's an everything server, in my house. I use it for Plex, it hosts my files and photos, it manages my surveillance cameras and acts as a camera DVR, it runs a Minecraft Server, it's a Git server, it even runs Docker.
The Synology will act as my VPN server as well.
Here's how I set up four things. The Synology, my Router, my iOS device, and my Windows PC/Surface.
The result is I can now remote into my home and manage things from any device I own.
Setting up a Synology for L2TP VPN
First, in the Synology Package Manager, ensure that you've got the Synology VPN Server package installed and running.

You should give some though as to which VPN technique you want to use. I decided on L2TP, although there is some concern the NSA has weakened it. Benefits are that it's on all major platform, it's generally considered secure, and it's easy to setup.
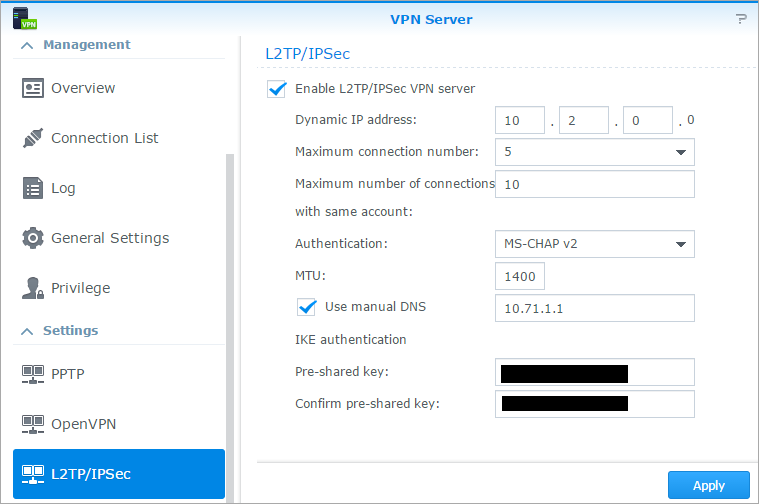
Select L2TP (or whatever you want), and Enable it. Notice also that I selected my INTERNAL DNS server. I found this worked best for me when trying to access internal resources. You can also setup a hosts file if you want to just hit a few things inside your house.
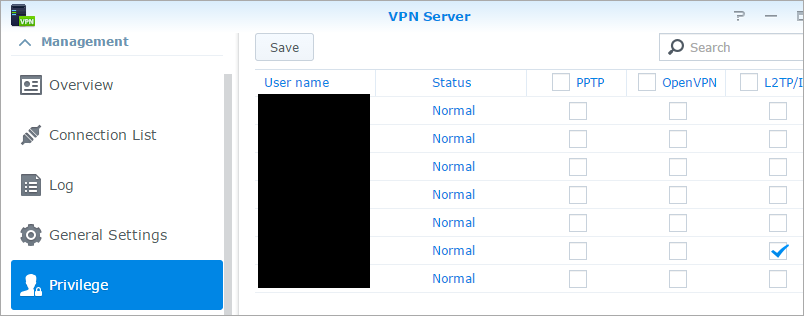
Now click on Privilege. Just give the minimum privileges to the user that needs them. NO need to give VPN access to users who won't use it.
Setup your Router for VPN (L2TP)
My router is a Linksys WRT1900ac that I like very much. It supports port forwarding, and the Synology can often talk directly to a router and request open ports. However, there's something to be said for handling things yourself. It lets you know exactly what's going on, and it can be less of a "black box."
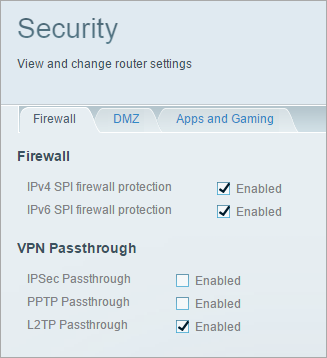
Login to your router and in this case of L2TP, forward UDP ports 1701, 500, and 4500. On my Linksys, it's under Security, Apps and Gaming.
The Device IP is the internal IP address of your Synology. It's best to have your Synology use a Static IP address, or at least have a DHCP reservation so this IP doesn't change and things stop lining up.

Also, ensure that your Router is passing L2TP traffic as well. I changed this under Security.
At this point, you should be able to at least try to connect to your house via VPN. I did this as a quick test by taking my iPhone off the wireless networking (thereby being on the open internet) and VPN'ing back in.
If you succeed, you should be able to see yourself in the VPN Server | Connection List area on our Synology.
Here's what I did on my iDevice to setup VPN.
Setting up iOS/iPhone/IPad for VPN
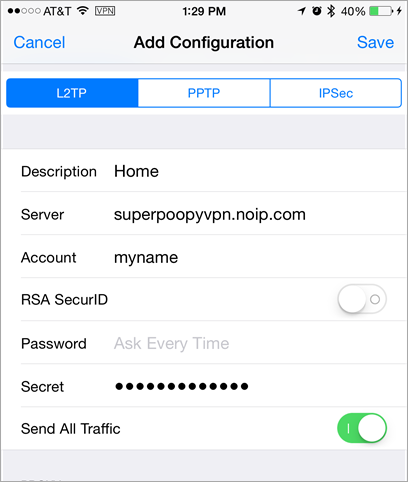
From the iOS Settings app, go General | VPN. Touch Add VPN Configuration. I selected L2TP and put in my Server name or IP and named the account "home."
NOTE: If you don't want to use your IP address, you can use the Synology.me dynamic DNS feature built into your Synology, or any one of many dynamic DNS systems that will give you a nice domain like "myhanselmanhouse.foofoo.com" or whatever. You can also, if you like, setup a CNAME with your own domain and point it to that dynamic domain. So vpn.hanselman.com could be your server, if you wanted.
With L2TP you'll need your username and password, as well as a Shared Secret. That's like another password. Specifically the Secret text box in iOS is the "pre-shared key" from your Synology L2TP VPN setup.
At this point you'll get a nice VPN option on your Settings app under Personal Hotspot that wasn't there before. You can turn it on and off now, easily.
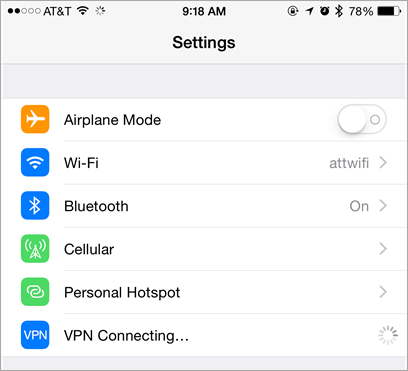
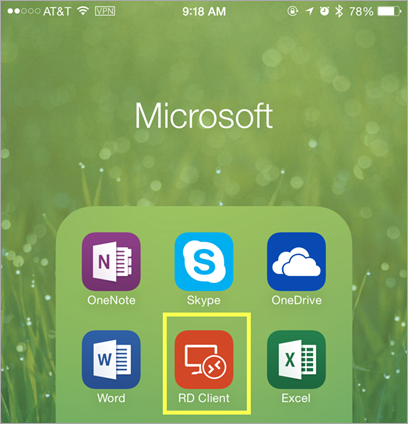
Once I'm VPN'ed in I can see a [VPN] indicator in the top status bar. I've installed the FREE Microsoft Remote Desktop Client for iOS.
And here's me VPN'ed into my home PC from my iPhone. This of course, can be done on Android and Windows Phone as well.
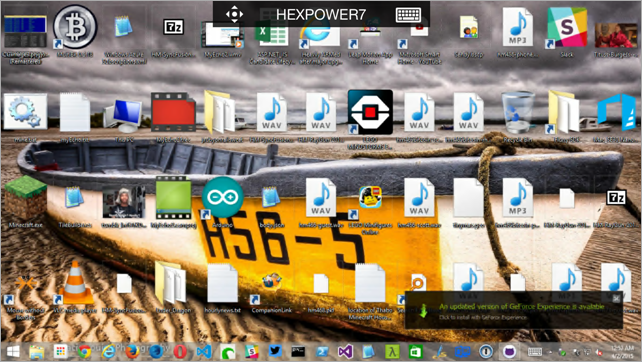
It looks small, but in reality it's very usable, especially from an iPad with a Bluetooth Keyboard.
Setting up L2TP VPN on Windows 8.1
Now I'll setup VPN back to home on my Windows 8.1 machine. For some reason this was super easy in Windows 7, but in Windows 8.1 there isn't a clear way to just add a L2TP VPN. You can add other simpler (or Vendor) VPNs in a straightforward manner, but not L2TP.
Just hit the Windows key (or Start Menu) and type "Add VPN." When you get to the VPN management screen, you'll see this and can fill it out.
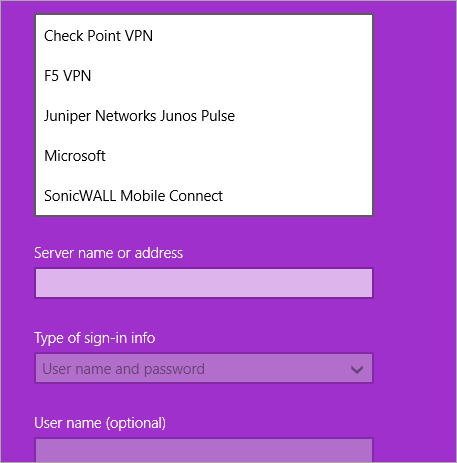
But L2TP VPN setup with a pre-shared key requires some more work. If you know of a simpler way, let me know. I can see about three different ways to get to the same result.
Go ahead and create a new VPN connection with the menu above. Select Microsoft as the VPN type and put in your server address and optionally name and password. This will create the VPN connection.
Pay attention now. Go back to the Start Menu and type "Network Connection." You want the first item called "View Network Connection" (a classic control panel, not a fullscreen 'metro' one).
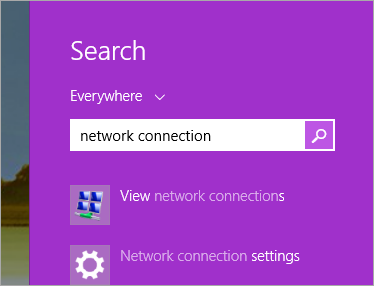
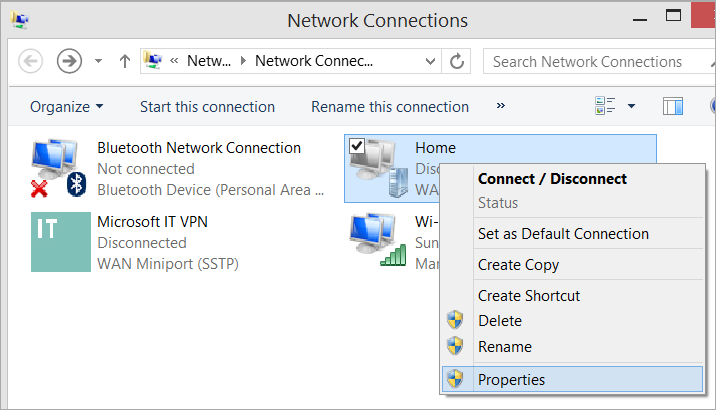
From there, yo;'ll open a classic control panel and see your VPN connection. Right click and click Properties.
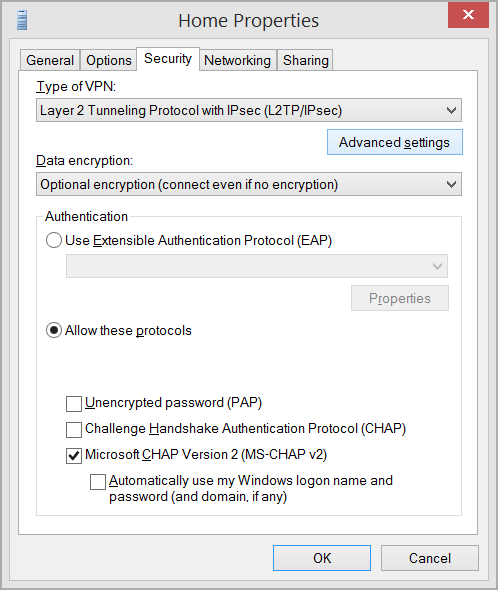
Click Security, make sure L2TP is set, then click Advanced Settings.
 '
'
Put your pre-shared key there.

Connect to your home VPN and have fun
Of course, please do remember to use strong passwords, strong pre-shared keys, and change them. Don't be lazy.
At this point you can connect to your home/office and work to your heart's content.

For some of you this is "duh" or old hat, but for me it was something I just never got around to doing. Mostly laziness prevented. But just last week I had to drive 30 miles back to my house from a dinner in order to move a file from my Desktop into Dropbox. I'm pretty sure I'm not the only reasonably smart techie with a story like that. This VPN setup would have meant I could do that from my phone and it would have saved me a big hassle and over an hour of my time.
RELATED LINKS
- The Computer Backup Rule of Three
- A basic non-cloud-based personal backup strategy
- On Losing Data and a Family Backup Strategy
- Windows 8, Step 0 - Turn on continuous backups via File History
- Automatically Backup your Gmail account on a schedule with GMVault and Windows Task Scheduler
- Give Grandpa and Grandma the gift of an off-site backup of your photos
© 2015 Scott Hanselman. All rights reserved.


